We’ve all been there, right? I remember creating my first ever “website” (a blog on an early platform called Xanga) - and in doing so, choosing my first ever slug, or URL. And so, “xanga.com/bobcatkels” was born (an ode to my high school mascot, of course!). Time passed, we all grew to better understand how the World Wide Web works, and I realized I didn’t want to tell everyone that visited my blog where I went to school - but - there was no option to update that identifier. The slug was permanent. My URL was etched in the stone of the internet for all of eternity - unless I chose to delete my entire account, which I did. Then I had to start all over again (and I lost some pretty great poems dripping in teenage angst)!
Let’s skip to the good part.
Just last week, a user asked me if they’d need to delete their Calendly account and start from scratch because they’d changed their business name and wanted their URL to reflect that. Imagine their excitement when I told them absoLUTELY not! and showed them right then and there how to change that Calendly URL! What’s that? You’d like to learn too? It’s your lucky day - see the video below!
...and there you have it! Here are the steps in written form:
To change the link to your main scheduling page
Note
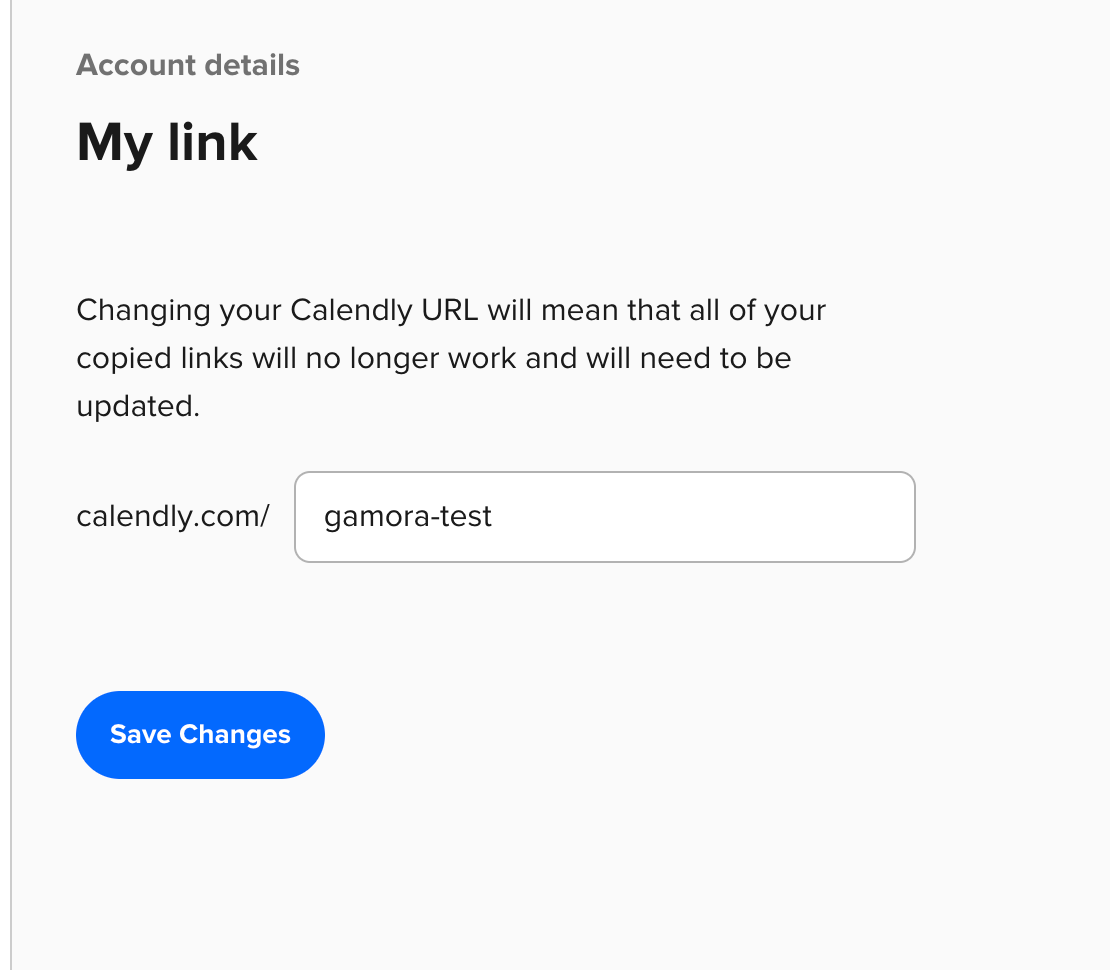
When you change the link within your account settings page, previously-shared links for all events will no longer work.
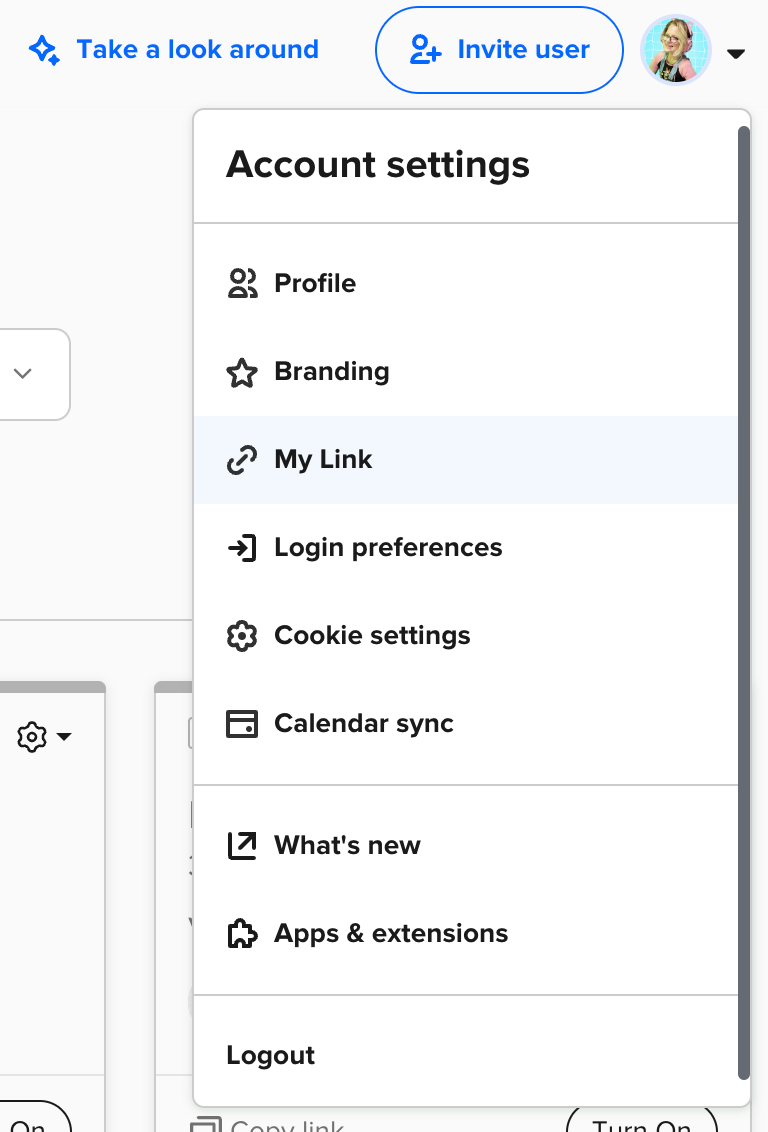
- At the upper right side of any Calendly page, click Account, then select Settings.
- Click My Link on the left.
- Change your link.
- Click Save Changes.
You can read more in our Help Center, here! Feel free to comment below with a story about your earliest days on the internet (or with questions about your Calendly URL)!


 Regardless, thank you for the input and for providing this feedback to your Product team. In the spirit of branding consistency and just...nice public-facing URLs, that would be a wonderful feature. :)