 On the seventh day of Calendly, my community gave to me: work arounds for managing event types (as a solo user) for multiple businesses and with unique brandiiing!
Welcome to the 12 Days of Calendly, a series of guideposts where we give you the gift of product knowledge and understanding!
On day six, Sam went over creating a collective event in a team page! Day five was full of information about how to share your landing page in creative ways. If you haven’t checked those out yet, you definitely should! Now, let’s get to ~dashing through the snow~ and on our way to the helpful information about managing event types for multiple businesses/brands below! 
Many solo users in Calendly are operating with higher level scheduling needs, have more than one business to book meetings and events for, and have a need to set up branding for those businesses/brands within a single account. While, at this time, there is not a way to setup separate branding per event type within a single user’s Calendly account, there are some fabulous workarounds that are perfect for these needs!
 Read below to learn more:
Firstly, you will need to be on a paid plan. You can read more about our plans, pricing and features on our Pricing Page! Note: an annual subscription will result in a 20% discount for all paid plans!
Once you’ve selected your plan you will add an additional user for each business/brand that you plan to operate from your main Calendly (owner/admin) account. Note: your additional users will be yourself using alternative email addresses.
Once you have sent invites to your alternative email addresses, accept those invites and join your new Calendly organization!
How to add additional users (click “show content” for more info):
Navigate to your Admin Management page and click Add Users.
Enter the email addresses of the users you're adding to your organization then choose which event types they will start with.
NOTE: A user can only be assigned to one organization at a time, so if someone is already a member of an existing organization, they will need to be removed. The user will receive an error message when logging in if this is the case.
A popup window will appear confirming the number of users you’d like to add, the cost of the new users and the prorated cost of your account as it currently stands. Once the changes are confirmed, invitations will be sent asking new users to join your organization. Monitor pending invitations from the Pending tab on the Admin Management page.
New Calendly users will set up an account while existing Calendly users will join your billing plan while their account settings and events remain intact.
Secondly, you will want to look into the differences between:
- a Team Page and team event types like Collective Event Types, Round Robin Event Types and Group Event Types
- Admin Managed Events
- Shared Event Types
For this use case and workaround, you are going to want to create a team page for each business/brand that you need to set up. After setting up a team page (please see this article by Sam!), head to step three!
How to set up a team (click “show content” for more info):
How to set up a team
- From any Calendly page, select Create + and then New team.
- Enter the Team Name (this will appear on your team scheduling page).
- Optional: Update the Team Page link and Welcome Message.
- At Team Members, type the member's name and select. Repeat for each team member.
- At Can manage team, select the team manager. Note that admins will already be selected as team managers. Users granted permission to manage a team will be able to create and manage event types that appear on a team page, and add or remove members within the team.
- Optional: Upload a Team Avatar. This will be the image that shows on your team scheduling page.
- To change the time zone for your team, at Time Zone, select the box and find the correct time zone your team schedules in.
- Select Create.
Note: To view your teams, groups, and users, use the My Calendly drop-down arrow on your Home page.
Related articles
Now that you have added your additional users to your organization and created a team page or team pages, you an customize as you wish. The best ways to use these tools to establish separate businesses/branding that can be booked simultaneously and have unique looks/names is to:
- upload a team avatar for each team page
- select a unique name for each team page and team page booking link
- keep the Availability Schedules and connected calendars for each member of your teams (your alternative accounts - you can add each to more than one team if needed!) up to date
If you do all of this when getting initially set up, you will be able to login to your owner/admin (main) account and manage most scheduling needs from within that single account. If one of your user accounts needs updates to their availability, integrations and/or calendar connections (for example), you will need to then log into the unique account for that user in order to make those changes.
All that’s left to do is create your team events types and get to booking!
 Tip: you cannot create a true one-on-one ET on a team page. However, you can use team events (Round Robin and Collective) to create one-on-one ETs by assigning only one host to those ETs. Read more about the details and how-to steps in Sam’s words, here.
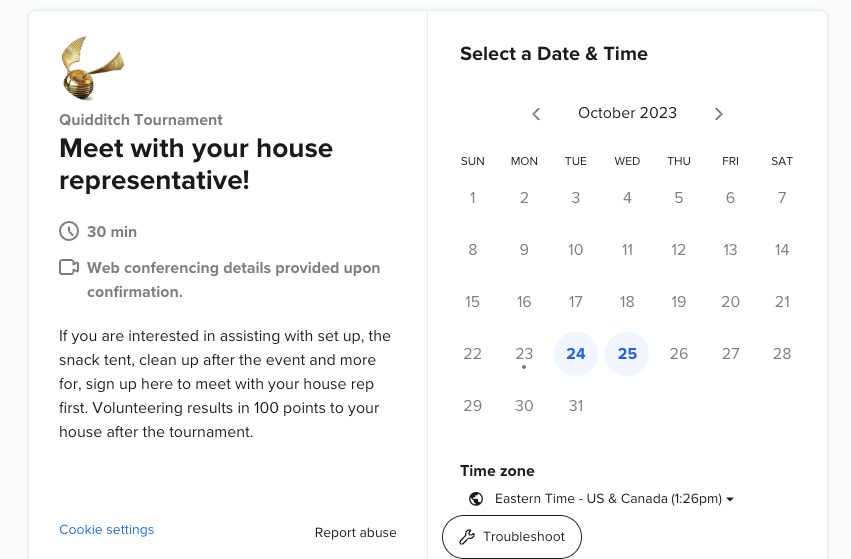
 Here’s an example of what live events on a public team landing page look like:
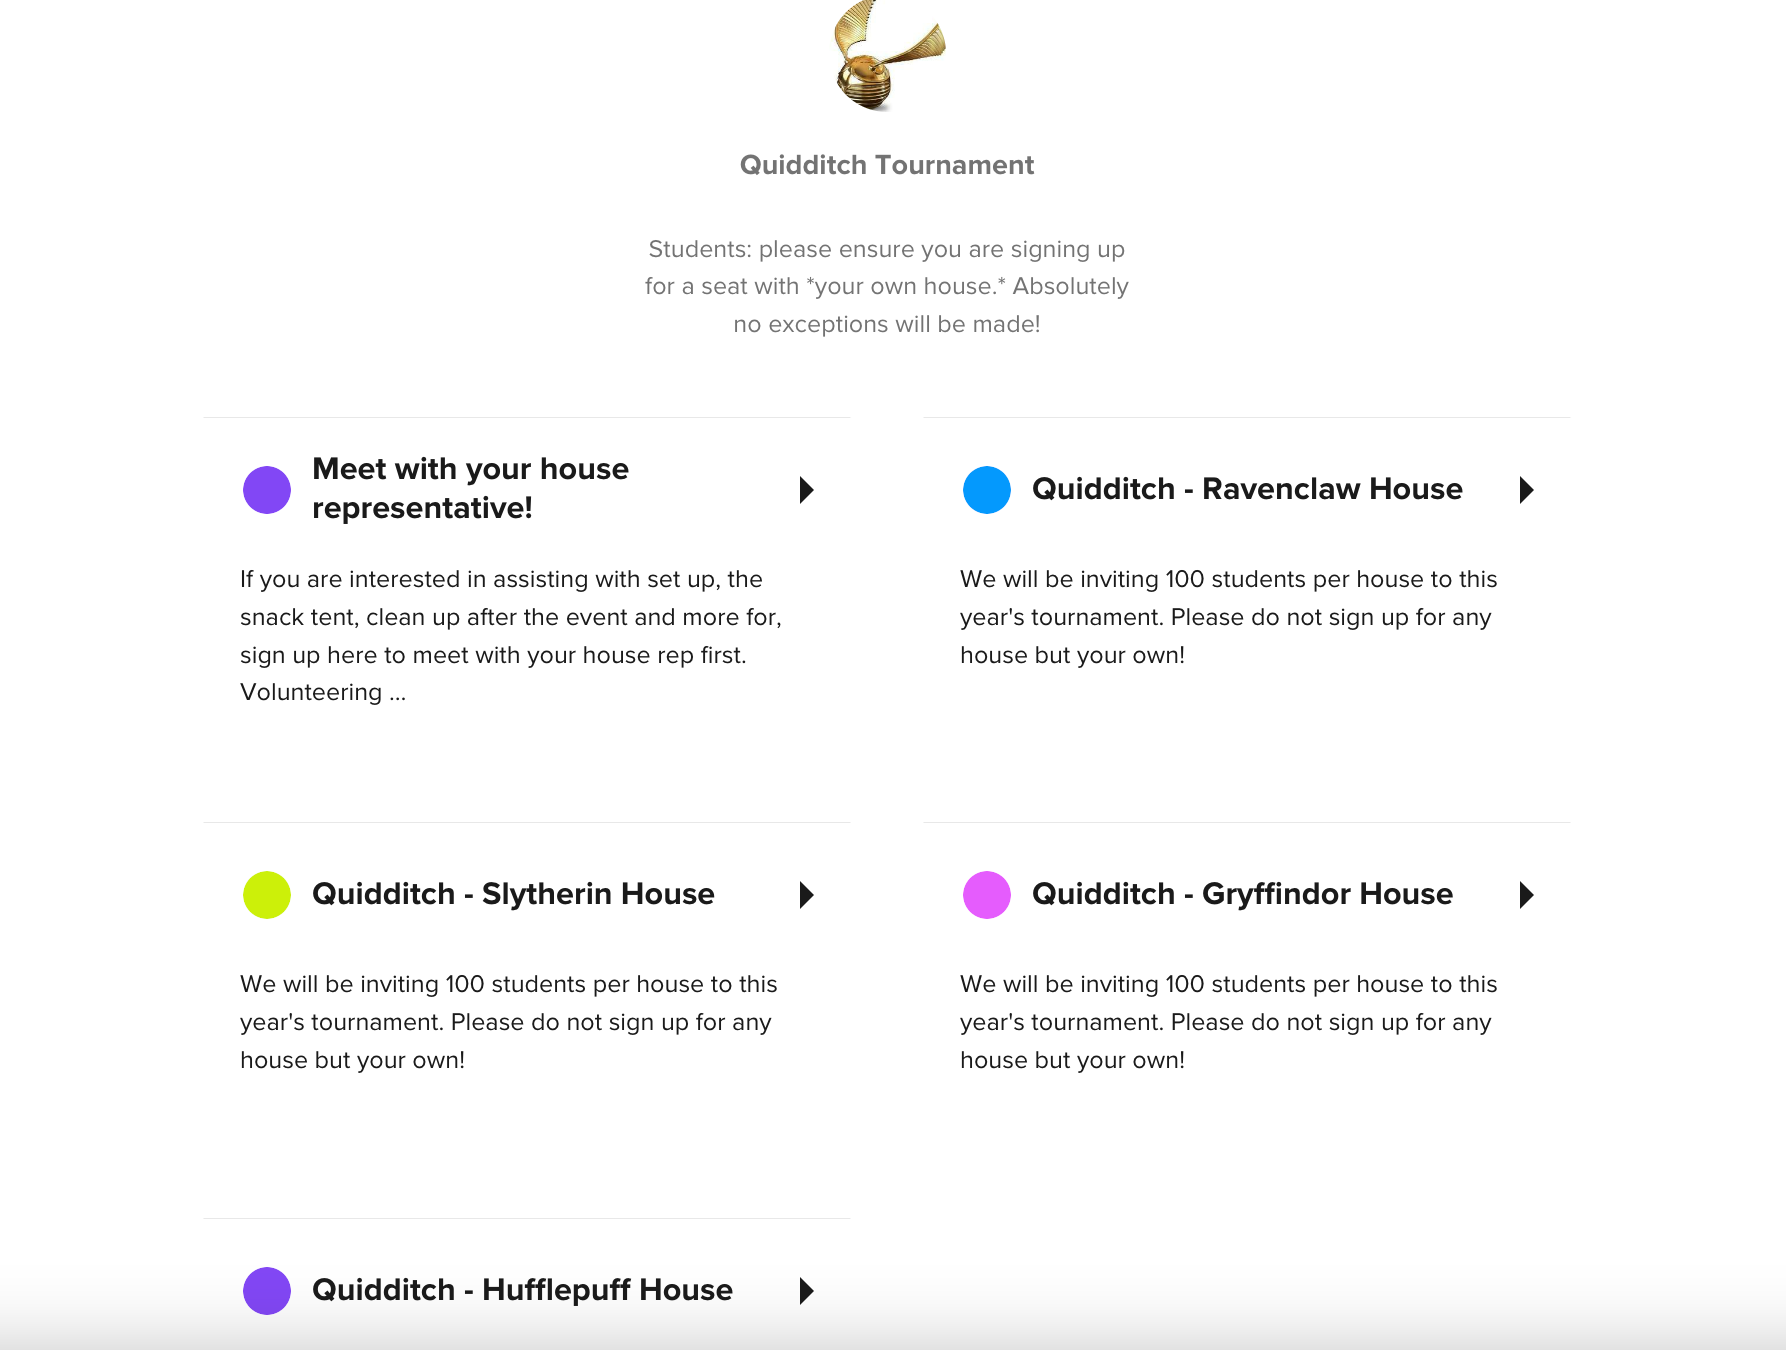
Note the team logo, name and description - this is what branding will look like if you use team pages for each of your businesses/brands.
 Tying it All Together with a Bow
Here is a full, start-to-finish description of how to take all of the above info and combine it for your use case (click “show content” for more info).
As described above, you can add a single user to a team page. So, you could create three team pages for three businesses/brands, add one user to each team page and create events for them on those team pages with branding for each. This would allow you to control all events and branding from your owner account, rather than logging into each individual account to set up logos/avatars etc. You can even manage the availability of all three users on their team pages from your owner account, within the event types created. You can use Collective Event Types or Round Robin Event Types on the team pages with one user assigned, so they translate as one-on-one events (since one-on-one event types cannot be created on teams pages).
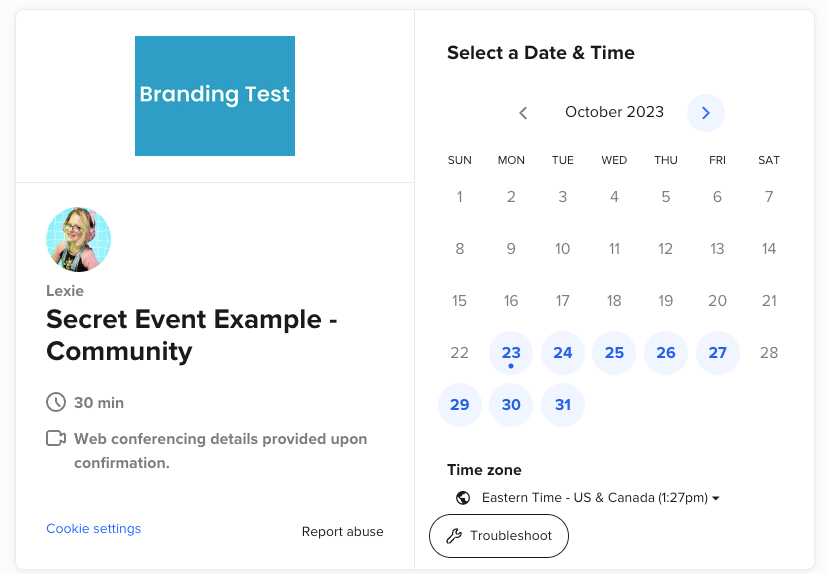
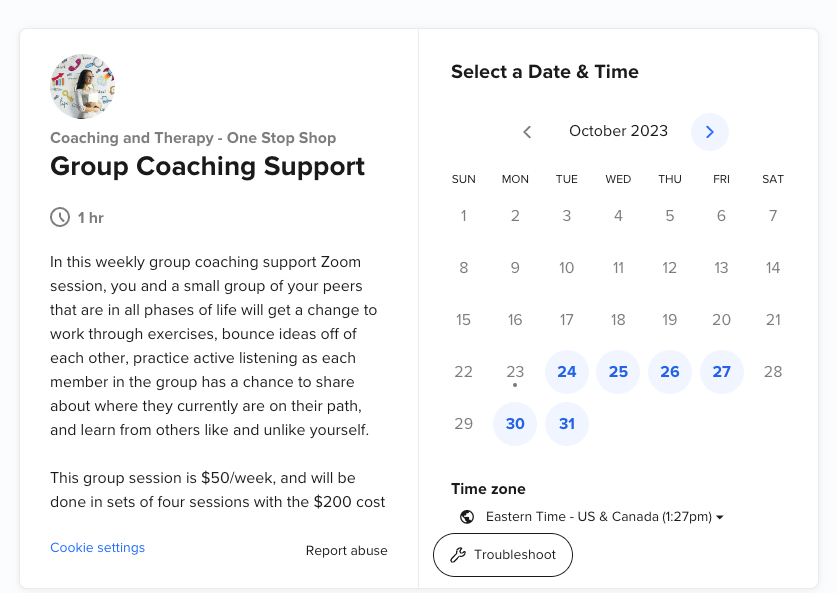
Here are examples of events on two different teams pages in my test account with different avatars as well as an example of a third event type with its own logo on a regular user page:
Related community articles:
- Customize Calendly to Reflect Your Company's Branding
 Giving Thanks and Gratitude: Calendly Tips and Tricks for the Holidays
- Best way to handle overlapping events?
~That’s a wrap~ on the seventh of  12 Days of Calendly! We look forward to seeing you again tomorrow, where Sam will go into detail on the topic: Adding Calendly to Your Website! Check back in for that and more through December 15th!