Hey, Calendly Community! 👋🏻
I am casually coming to you this fine evening with a workaround - don’t you just love those?
What’s a workaround, you ask?
Well, a workaround is something we can implement when there’s not exactly an existing feature or functionality that helps to meet a goal you have - but with a little extra effort and creativity - still allows for the endgame to look nearly identical. 💪🏻
This specific workaround pertains to Group Event Types and the invitee limit that you set within each.
💡Use Case Example
You have set up a group event with an initial invitee limit of “15” per time slot - and you are excited! You will be teaching groups of people how to paint while also displaying art by you and other local artists for sale, gallery style. To top it off, you will be offering discounts for a series of painting lessons - and you are expecting a full house in every time slot due to some strategic marketing on TikTok. 📱 Way to go! You’re doing it - you’ve done it! 💃
That said - you’ve decided that you’d prefer to offer fewer invitee spots in some of your later time slots on the day of the event, because as the day goes on you know you’ll be lower on energy, but you still want to be able to offer your full attention and efforts as a teacher to those that sign up. 🤗 Totally understandable!
There is currently no way to set up different invitee limits per time slot from within the event type settings, but there is a ✨workaround✨ that will help you in this scenario. Generally speaking, we would suggest (and have seen success with!) creating multiple group events with different invitee limits in order to make this work. That is a fantastic solution for many users - but what if it’s not perfect for you and your needs?
Keep reading to find out how to move forward!
Now that we’ve made it this far, what’s a person to do? Well, I’ll tell you what!
❓How to Update the Invitee Limit for a Group Event Type After It’s Been Booked
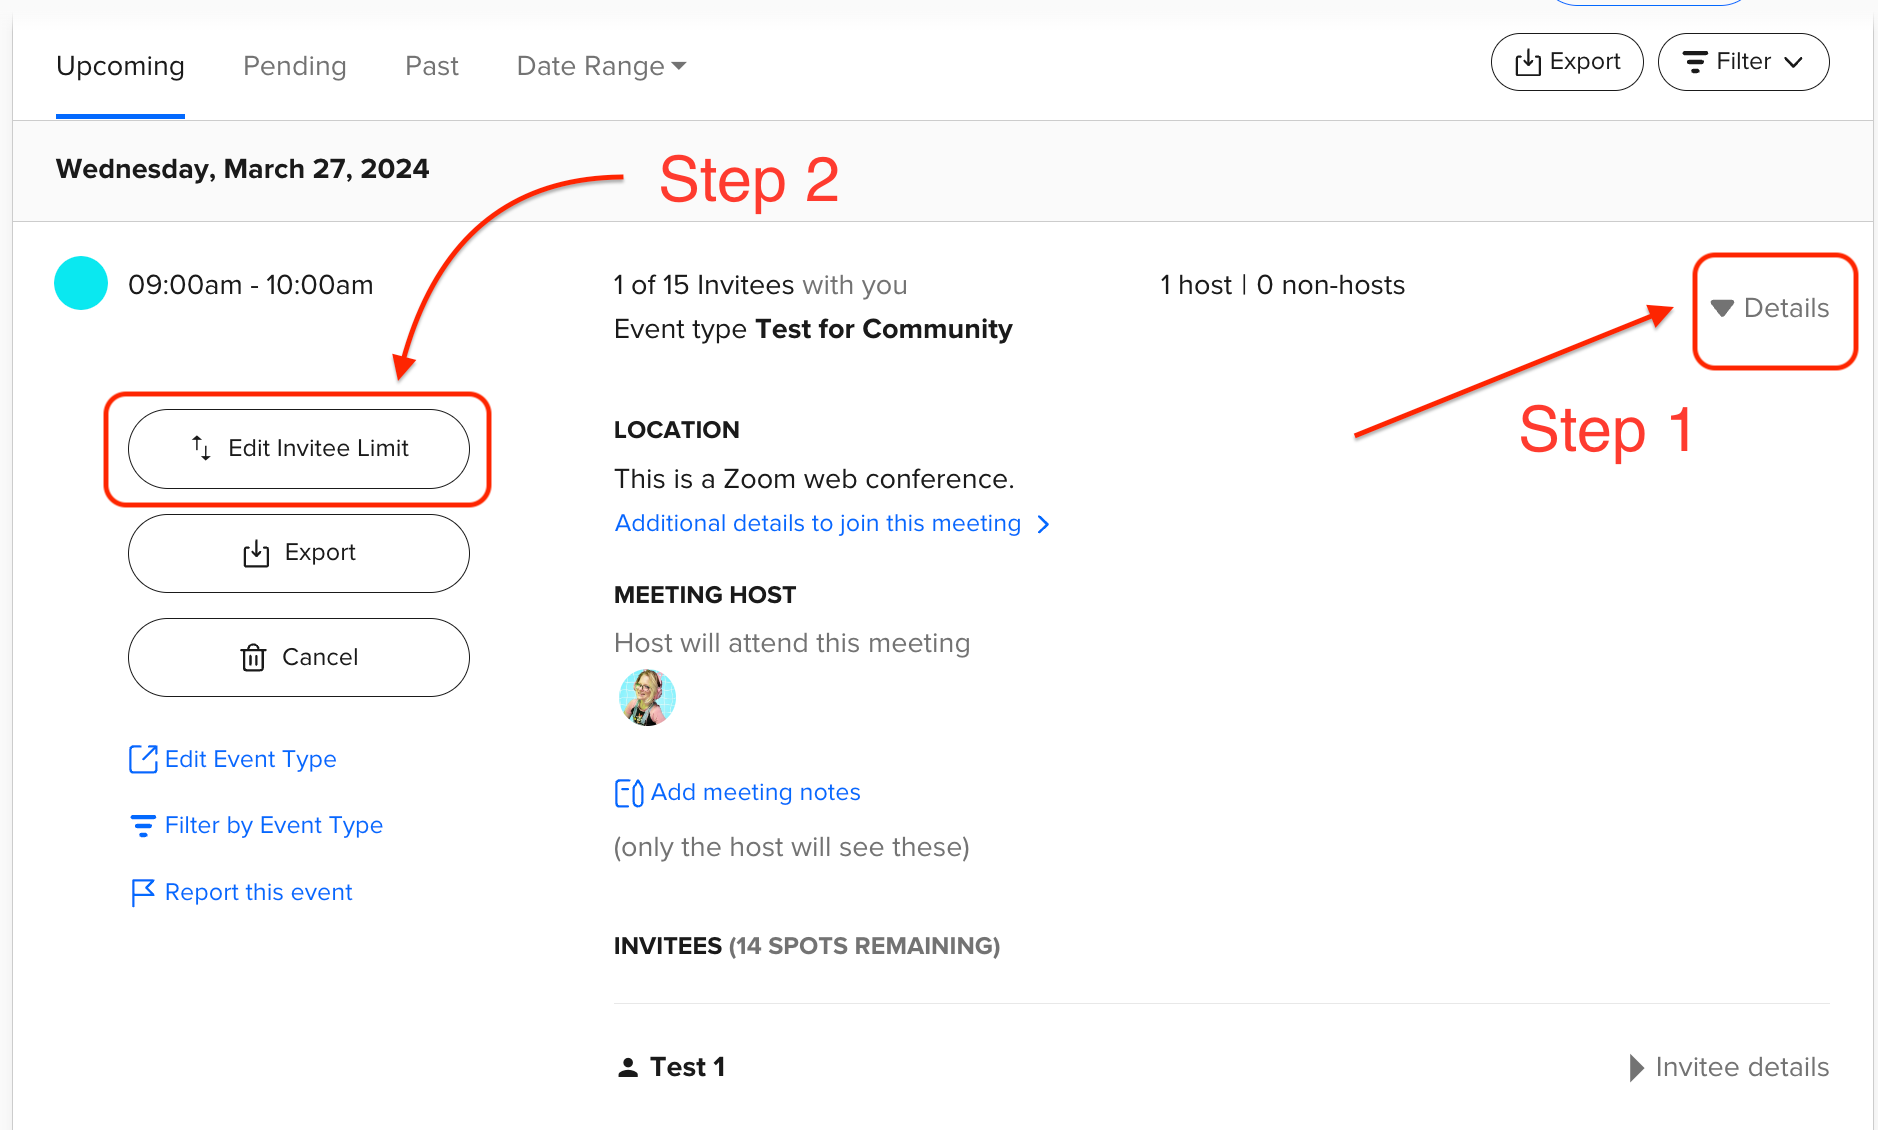
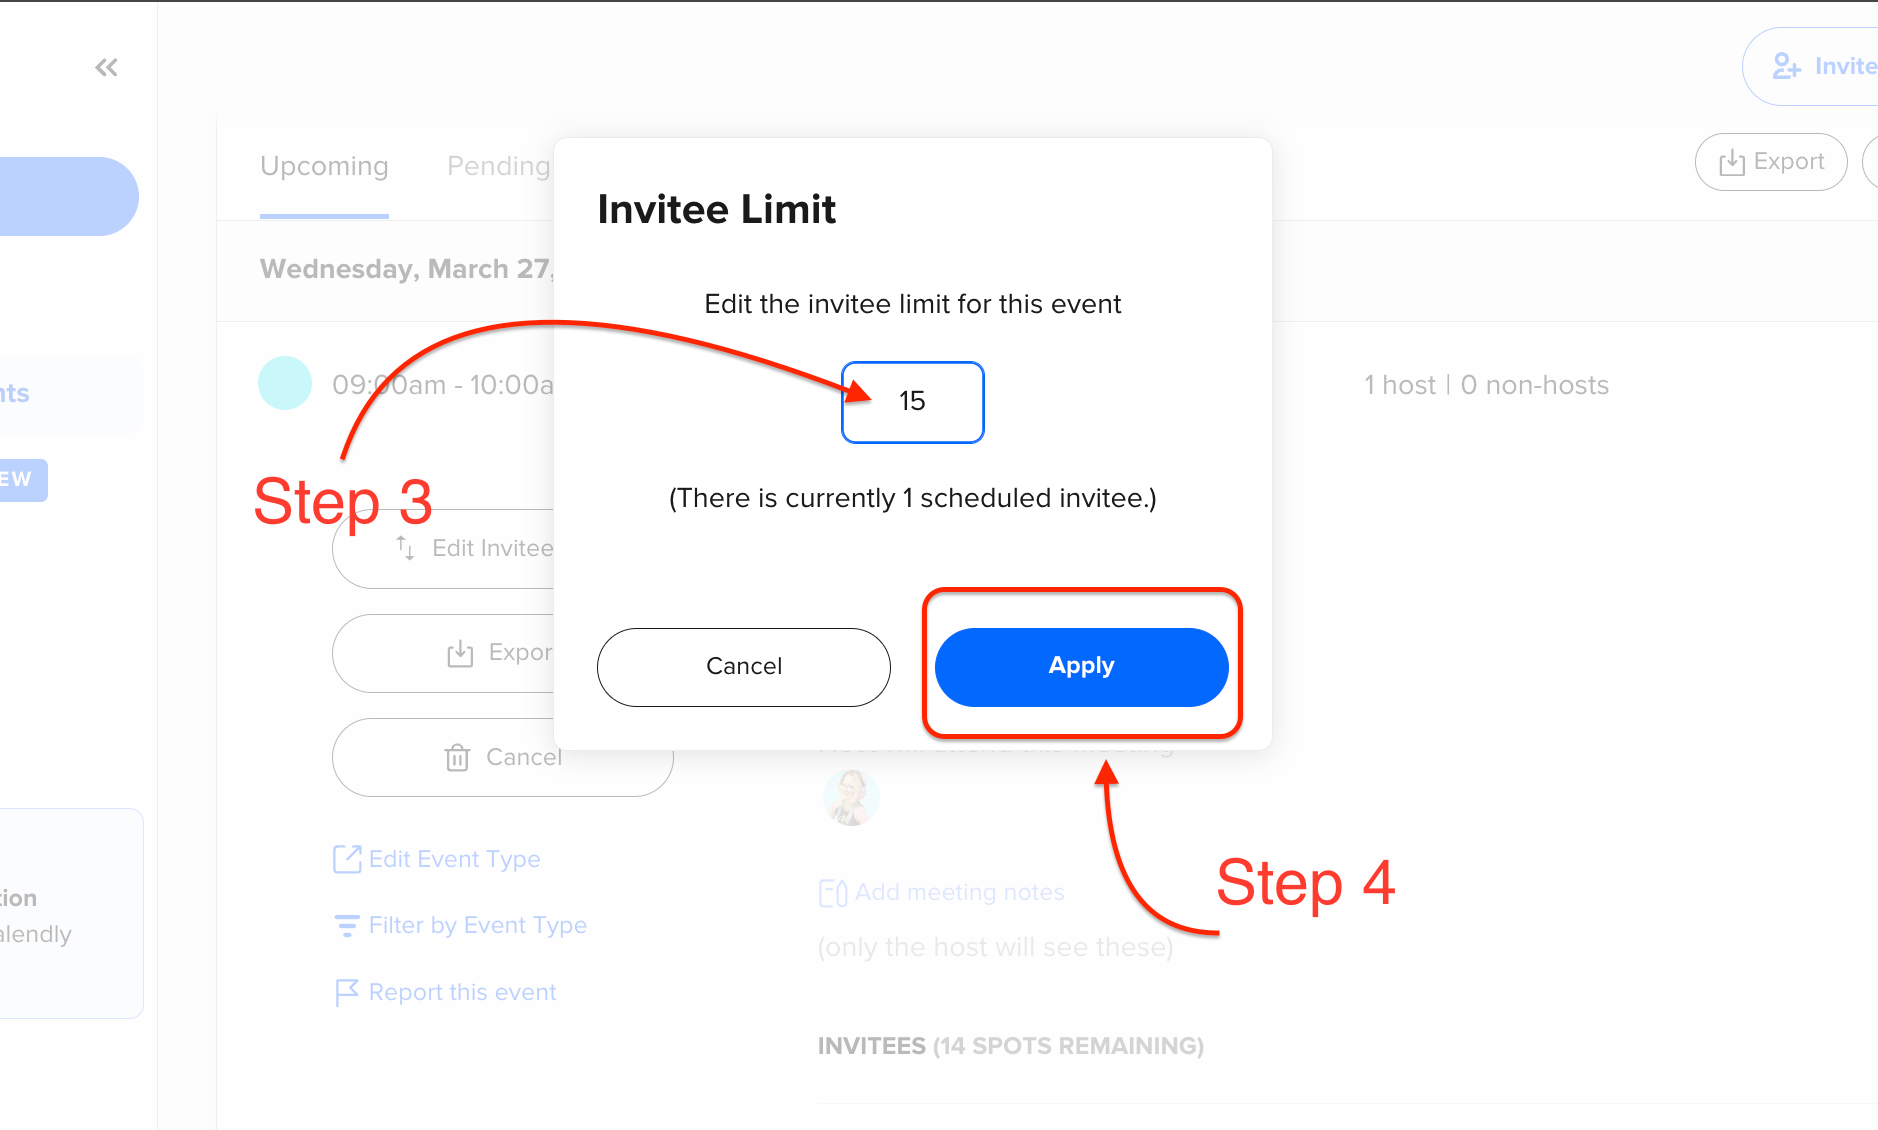
ℹ️ First, you’ll head to your “Meetings” tab > click “details” next to the desired time slot > click “edit invitee limit” > change that limit! Next, you’ll edit the text field under “edit the invitee limit for this event” > click “apply”! See the screenshots below for an overview of these steps:


PHEW. That was easy!
❓But what if you want to change the invitee limit for time slots that no invitee has booked yet?
ℹ️ In this case, you’ll need to first head to your public booking page and book a spot in the desired time slots yourself. This way, that booking appears under your “Meeting” tab and you can follow the steps to change the invitee limit for that time slot. Repeat as needed for the time slots you wish to have different invitee limits for - you’re all set!
Still not sure you understand? That’s okay! These things can feel much more complicated than they are until you’ve seen them in action. I am a visual learner, myself, so I love to teach that way too! See the below video walkthrough of these edits being made.
...and that’s it!
Now that you have a thorough understanding of how to make this happen - you’re officially a
⭐ Workaround Star! ⭐
What workarounds have you implemented using Calendly in order to meet your use case goals? I want to hear about them - and so does your community! Nothing would make us (the weirdos behind the screens that call ourselves your staff) happier than to see an engaging conversation about what you all do to make the things that don’t want to work - work! Let us hear it! 👂
Until next time - thanks for reading!
...you thought I was done? Not quite! Check out these related articles from our community when you have some downtime and feel like reading. 📚 You’ll be glad you did! 🎉


