Hey CalPals! 👋
When scheduling becomes a team effort, making sure invitees land on the right calendar is crucial - and that's where Calendly’s Routing Forms shine.
Whether you're managing a diverse support team, coordinating faculty meetings, or organizing regional sales calls, Routing Forms simplify the process by collecting key information and automatically directing each invitee to the right person. It’s smart scheduling, tailored to your team’s needs.
For example, you can:
- Offer a selection of members from your support team with different specialties
- Schedule advising sessions or conferences with different teachers or faculty-staff
- Allow invitees to choose a sales team member that represents their region
Who Can Use This?
Calendly’s Routing Forms are available to anyone on Teams Plan and above!
Have questions on our plans? Feel free to check out our pricing page!
Before you begin
- Create event types for your form to route to.
- From the Routing page, all users in the account can view and share any Routing Form.
- For a user to edit a form, owners or admins must grant them editing permissions.
How to let invitees choose a host with Routing Forms
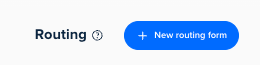
Step 1 – Create your form
To get started, set up a routing form to collect invitee information. This form allows invitees to provide key details and select who they want to meet with. For detailed step-by-step instructions, see this article.
Step 2 – Set up routing rules for your team members
Once your form is ready, create rules to match invitees with the appropriate team member or event type based on their responses. For more details on setting up routes, see this article.
Step 3 – Publish and Share
Once your routing logic is set, publish and share your form. Invitees can then schedule with the right host based on the form and logic you've created. For more details on publishing and sharing, see this article.
Do you use Routing Forms? Let us know if you have any questions below!