Take the hassle out of scheduling and connect more efficiently with Calendly’s LinkedIn integration. Whether you're adding your scheduling link directly to your profile or using the Calendly for LinkedIn browser extension, you can book meetings effortlessly, without ever leaving LinkedIn.
New and existing Calendly users can showcase their availability right on their profile, making it easy for visitors to schedule time with just a click. And if you're a LinkedIn Premium user, you can unlock the Book an appointment button for an even faster way to connect.
Who can use this?
Anyone user on any of our plans!
The steps to add this to your profile vary based on the type of LinkedIn account you have.
This article explains how to add Calendly to your profile, whether you're a LinkedIn Premium or Free user. The process varies based on your LinkedIn and Calendly accounts:
- LinkedIn Premium
- Add your existing Calendly link for the "Book an appointment" button.
- LinkedIn Free
- Add your existing Calendly link to your LinkedIn profile's Website section.
You can follow the steps below on how to add it to each type of account:
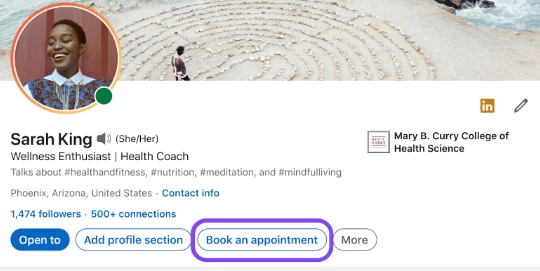
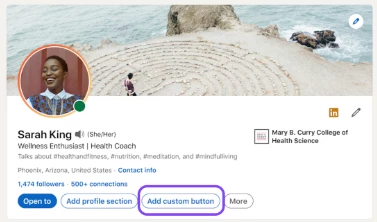
LinkedIn Premium
Follow these steps to add your existing Calendly link for the "Book an appointment" button.
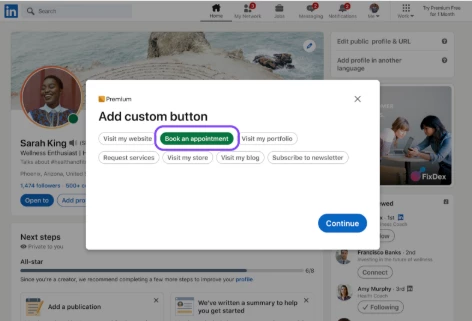
1. From your LinkedIn profile, select Add custom button.
2. Choose Book an appointment and select Continue.
3. Choose Use an existing scheduling link and enter your Calendly scheduling link.
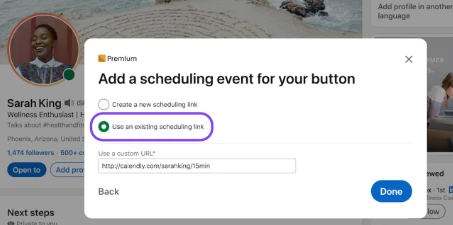
4. Select Done. You’ll receive a confirmation, and the Book an appointment button will appear on your profile.
LinkedIn Free
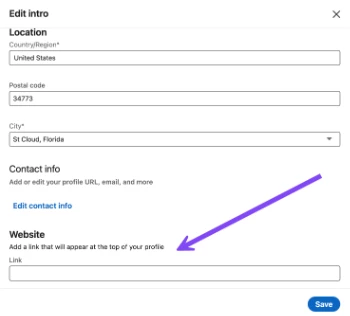
1. From your LinkedIn profile, select the pencil icon.

2. In the Website section, enter your Calendly link in the Link box.
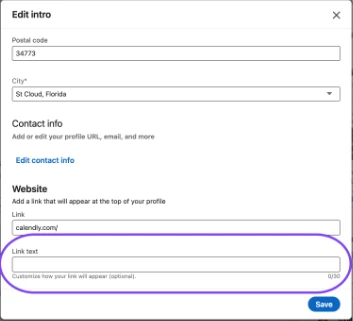
3. Under Link text, customize the text that will appear and select Save.
No matter your LinkedIn or Calendly plan, adding your scheduling link to your profile helps others connect with you faster.
Have questions? Let us know!