
Do you manage your schedule with a calendar software other than those currently supported in Calendly?
Here’s a great workaround that can help you facilitate a secondary calendar connection, allowing you to use Calendly in the meantime!
Problem:
Some calendar providers are not able to natively connect with Calendly.
Solution:
Share/subscribe/sync your unsupported calendar with a supported calendar–I recommend a quick, free Google calendar—making sure to share with read/write permissions.
Who can use this?
All of Calendly’s available calendar connections are available to users on all plans, from Free to Enterprise.
To learn about the features in each plan, feel free to check out our pricing page!
Why would I use this workaround?
This is helpful if your calendar is hosted by a calendar provider not included on this list:
How Can I Do This?
For some background, you can expect nuances from calendar provider to calendar provider.
Essentially, if you are able to connect an unsupported calendar to a supported calendar with full read/write access/permissions, you can facilitate a secondary connection to the unsupported calendar with Calendly.
💡Tip: ‘Read/write permissions’ may go by different names across different calendar providers. If you are able to view and make edits or updates to the calendar events of the unsupported calendar from the supported account, you should be good to go!
For the sake of this demo, I’m using a Zoho calendar as my unsupported calendar and a Google calendar as my supported calendar.
With Zoho, there wasn’t a single-step way to establish the two-way connection I needed. However, I was able to establish a Zoho→Google connection and a Google→Zoho connection that together will act as a two-way connection.
Google→Zoho
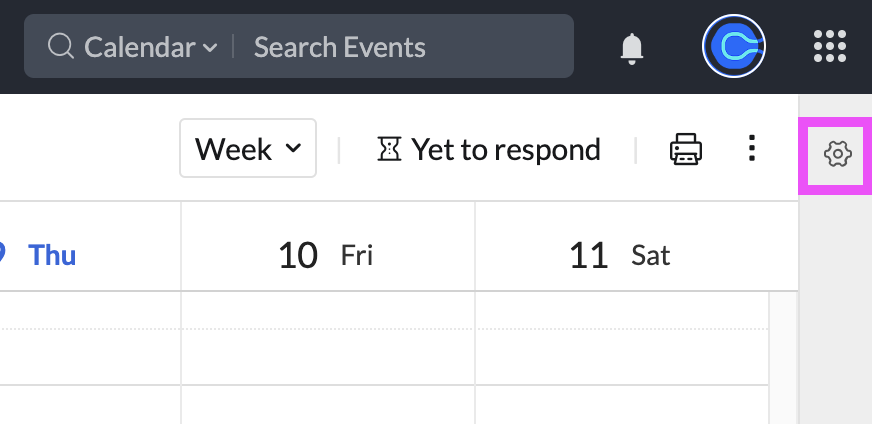
- Navigate to the settings page of your Zoho calendar.
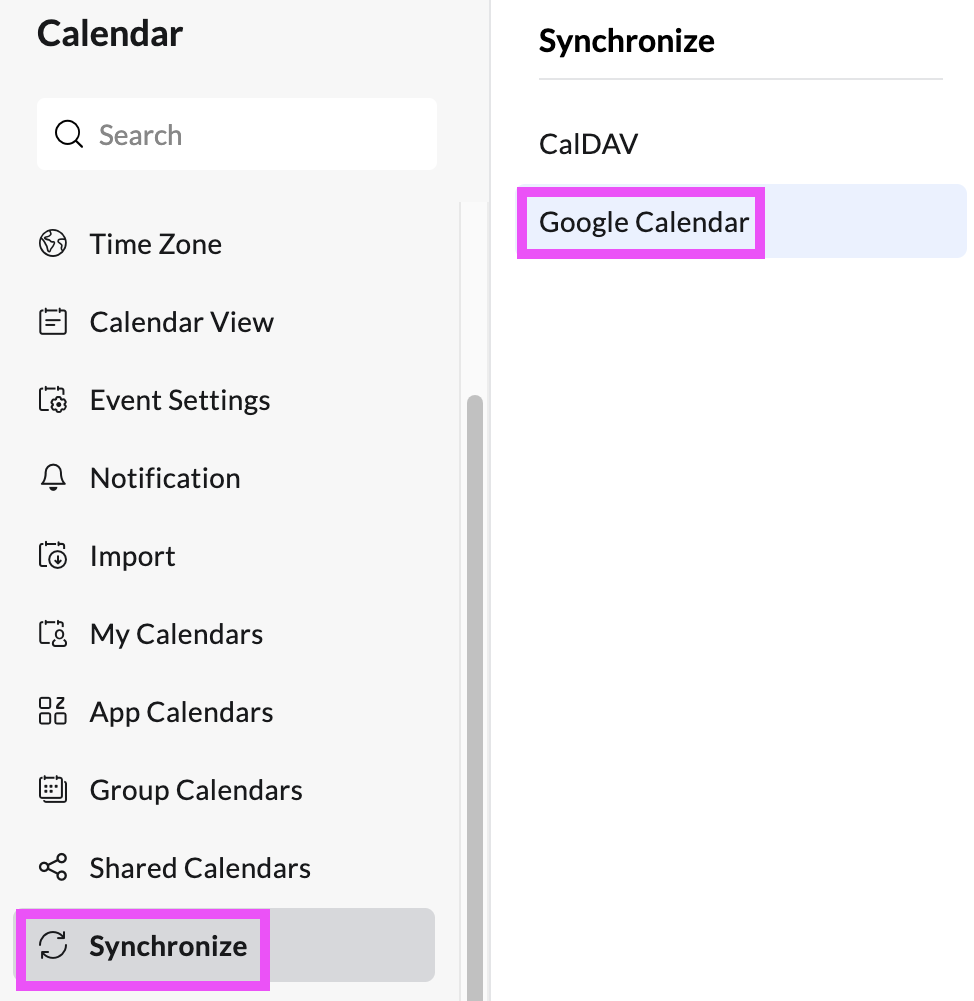
- Select “Synchronize” in the left sidebar and select “Google Calendar”.
Note: I signed up for my Zoho account using the Google account of my supported calendar.
- Select “Authenticate Google” and login to Google.
- Select “Synchronize”.
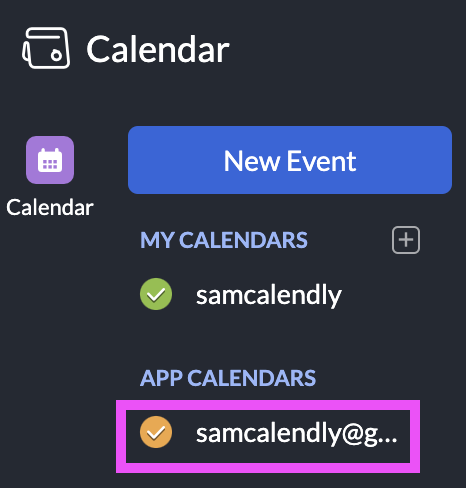
- You should now see the Google calendar appear in your calendar sidebar under “App Calendars”.

Zoho→Google
- Navigate to the settings page of your Zoho calendar.
- Select “Synchronize” in the left sidebar, open the Google Calendar dropdown, and click the Google calendar of your choice.
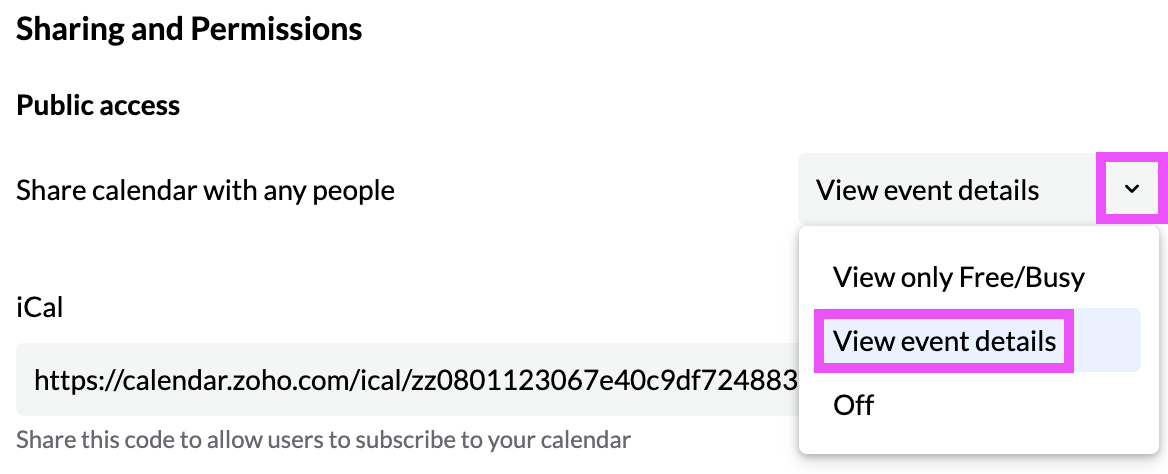
- Scroll to the “Sharing and Permissions” section, open the access dropdown, and select “View event details”.
- Copy the iCal URL.
- In your Google Calendar account, navigate to your calendar’s settings page.
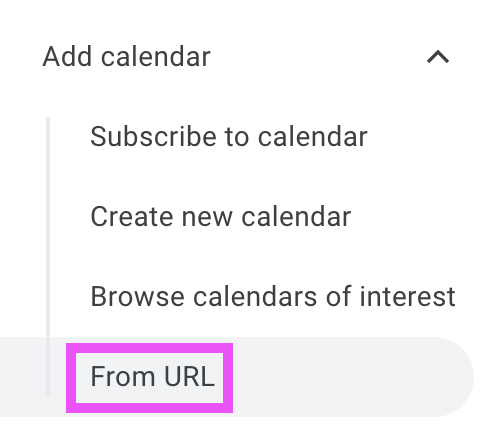
- In the left sidebar, open the “Add calendar” dropdown and select “From URL”.
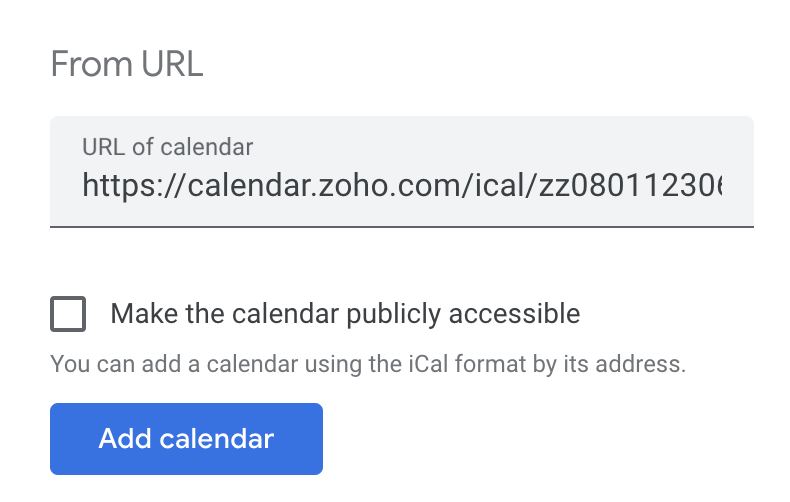
- Paste your URL in the field, and select “Add Calendar”.
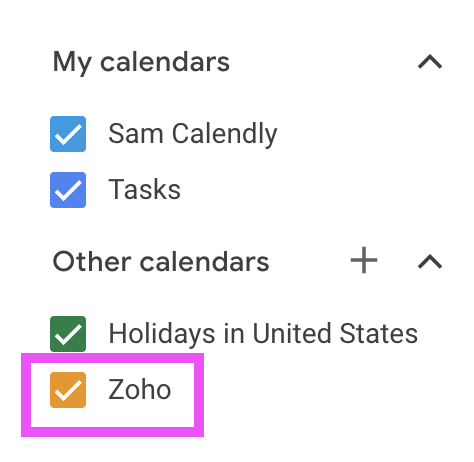
- You should now see the Zoho calendar appear in your calendar sidebar under “App Calendars”.
Note: I renamed mine to “Zoho” from the calendar settings page.


Google→Calendly
- In your Calendly account, navigate to your Calendar Connections page.
- If you haven’t already, connect your Google calendar.
- In your “Check for conflicts” section, select “Edit” to update/adjust the selections accordingly.
Love this workaround? Have questions about other possible workarounds? Let us know in the comments below!