Want to add your Calendly-booked events to a secondary calendar, other than the “add-to” calendar(s) of the assigned meeting host(s)?
In my experience, many teams may want their Calendly-booked events added to a secondary “shared company calendar” for easy, at-a-glance viewing of their team’s meetings.
Because Calendly only allows for booked events to be added to one “add-to” calendar per host, here’s a cool workaround to create event duplicates on a second calendar using our integration with Zapier.
Problem: Calendly booked events are only able to be added to the single, set “add-to” calendar(s) of the booked host(s).
Solution: Using the integration with Zapier, you can create a “zap” that generates a duplicate calendar event in a secondary calendar.
Who Can Use This?
Calendly’s integration with Zapier is available to users on our Standard, Teams, and Enterprise plans, as well as the legacy Professional plan.
FYI: The Teams plan is available for both multi-user organizations as well as for individual use. To learn about the features in each plan, feel free to check out our pricing page!
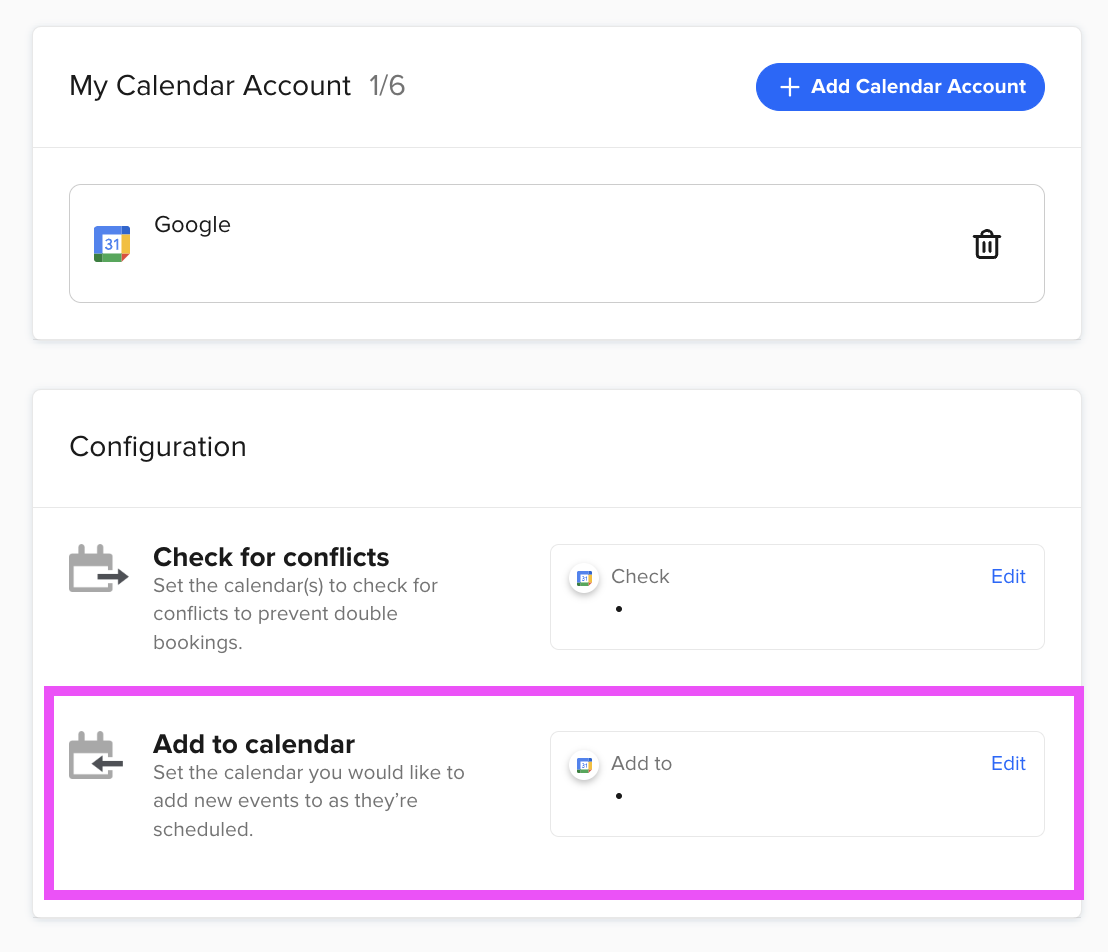
What is an “add-to” calendar?
Your “add-to” calendar is where Calendly will create your booked events. You can locate your “add-to” calendar settings from the Calendar Sync page of your Calendly account (or the host’s Calendly account) under Configuration, as shown in the screenshot below.
Connecting Calendly with Zapier
The first thing you will want to do for this workaround is connect your Calendly account with Zapier. For instructions on how to do this, take a look at this Help Center article.
Setting Up Your Zap
I’ve created a step-by-step guide for you below that shows how to set up a zap to generate a detailed calendar event in a separate Google calendar whenever someone books with me in Calendly. The same steps and logic can be applied to any other calendar supported by Zapier.
If you would prefer a video walkthrough, feel free to click here 😊
Step-By-Step Instructions
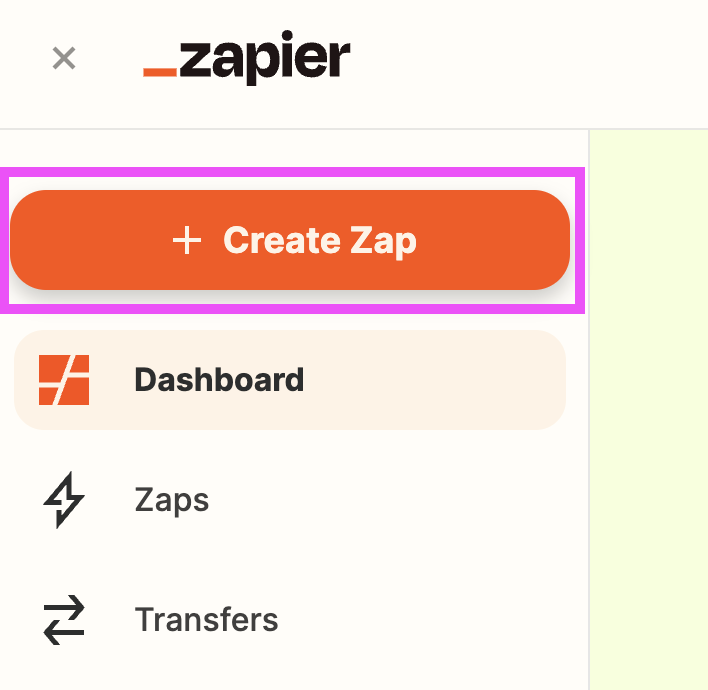
- Once you’re logged into Zapier, you’ll want to click + Create Zap in the top left corner of your home screen.
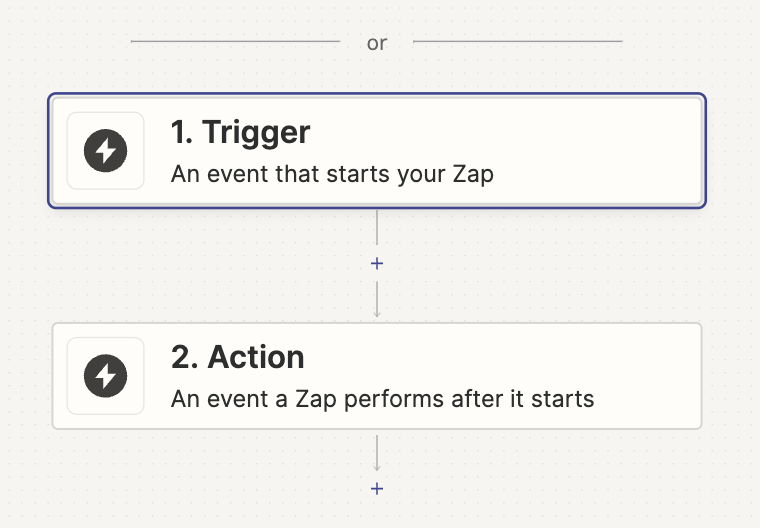
- Next we’ll need to configure the “Trigger”. Go ahead and click the Trigger box.
- Calendly may populate as an available trigger for you, or you can search for it in the search bar.
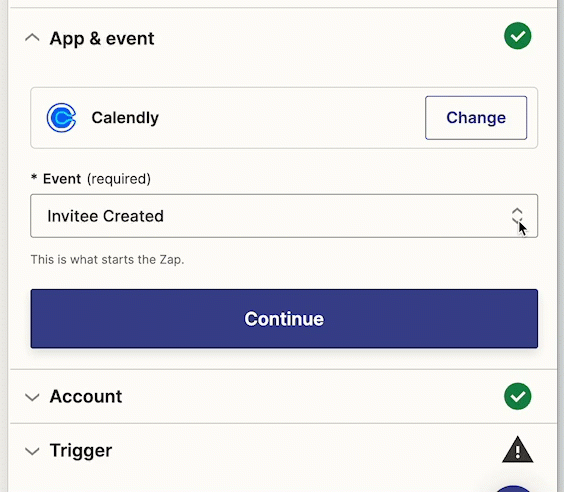
- Now we’re going to build out the conditions– Click to expand the Event dropdown and select Invitee Created, then Continue.
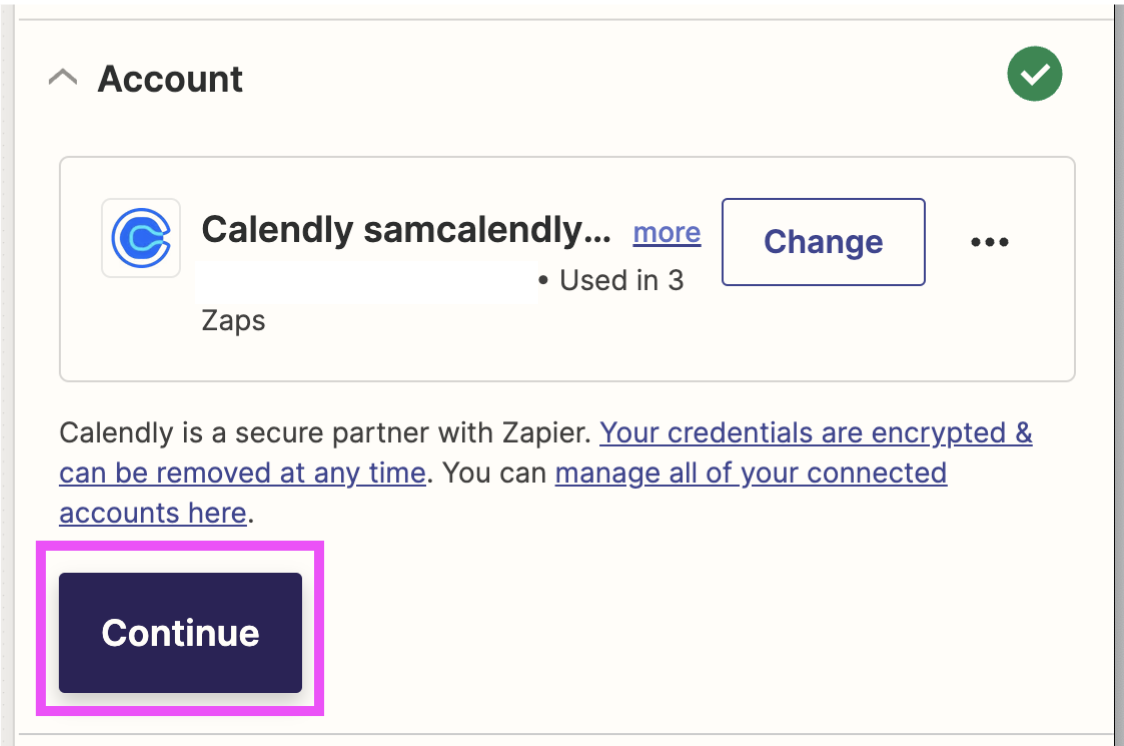
- If you already have your Calendly account connected with Zapier, you should see it populate in the Account section. Go ahead and click Continue.
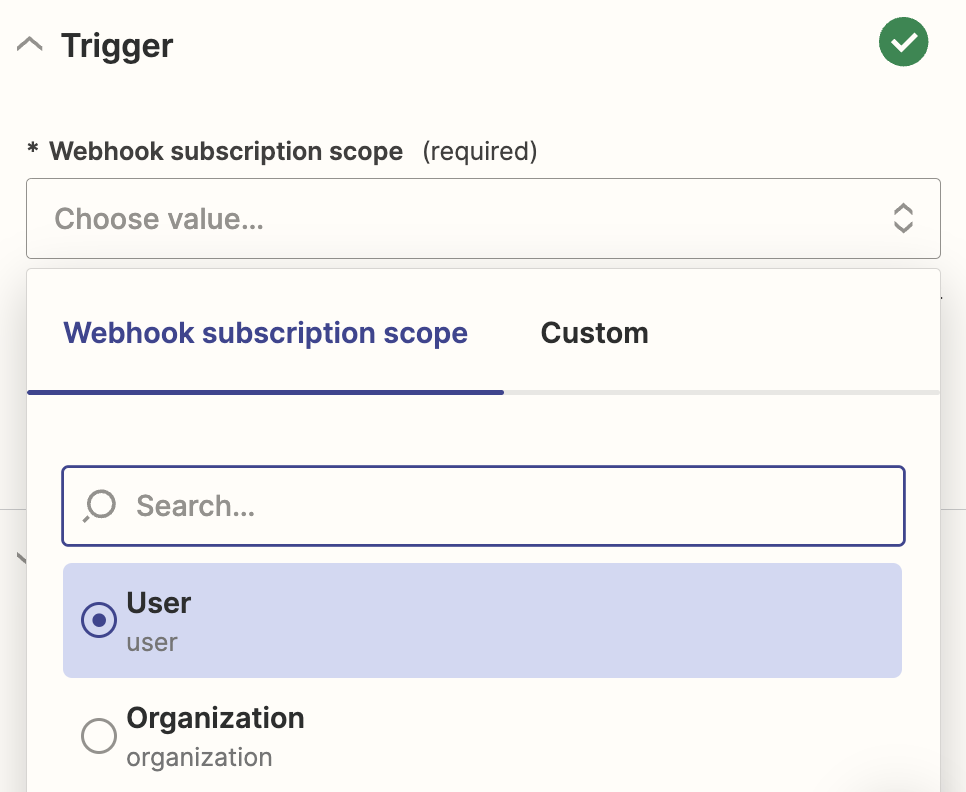
- Time to set your zap “scope”. This determines for whom this zap will apply.
Note: The user subscription scope only triggers the webhook for subscribed events that belong to the specific user.
The organization subscription scope triggers the webhook for all subscribed events within the entire organization. You must be a Calendly organization owner or admin in order to be able to use the organization scope.
↪ Once you have selected your scope, click Continue.
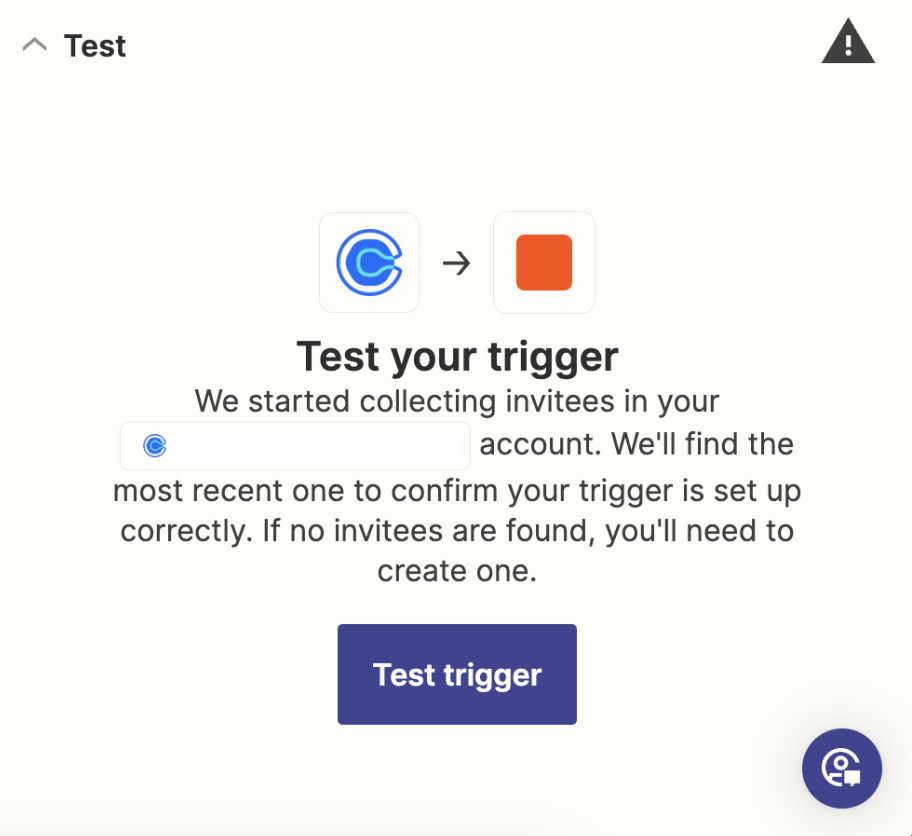
- Now we’ll need to test the trigger.
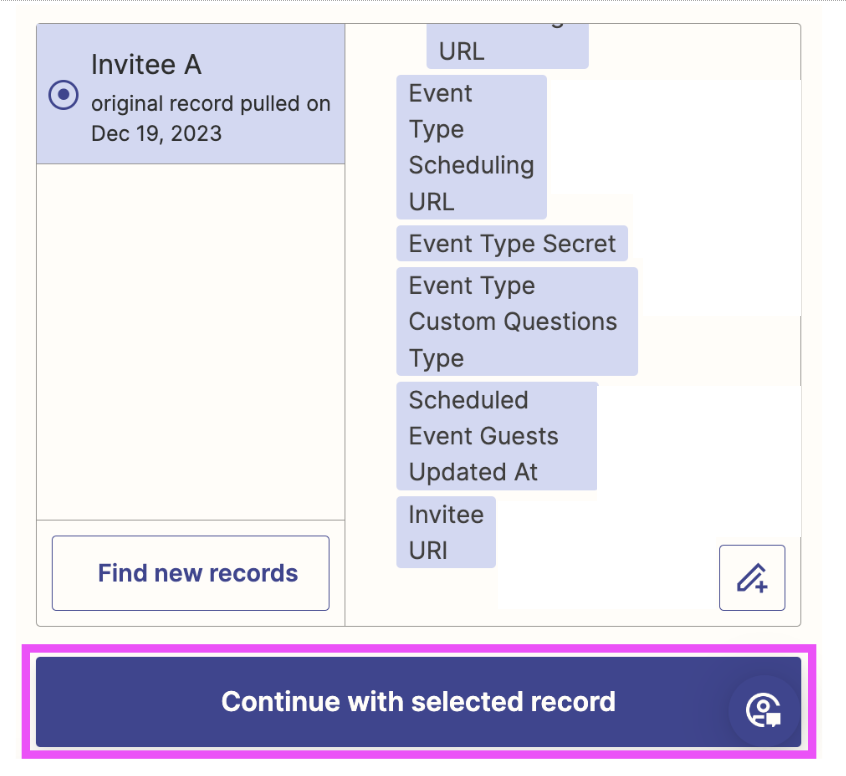
Note: It can help to book a test meeting in Calendly right before setting up a zap, so you can pull in the most recent data.
- Check that the data pulled is correct and matches a booking in your Calendly account, then click Continue with selected record.
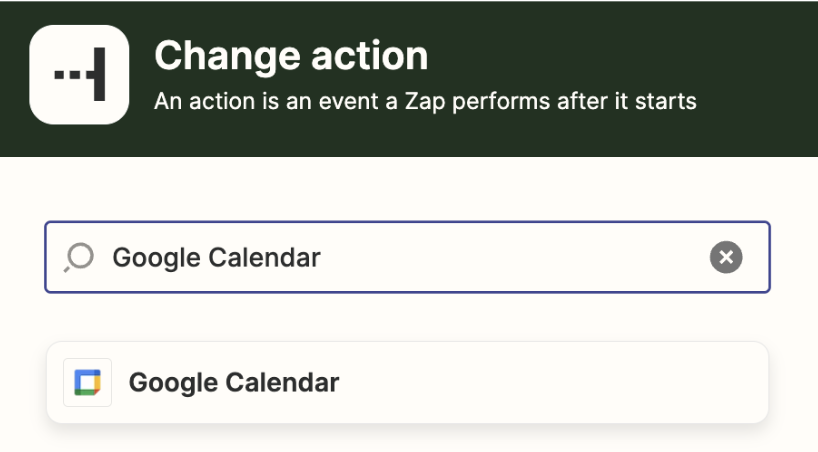
- Next, we’re going to configure the “action”. Here, you’ll want to search for your calendar provider. I’ll be using Google Calendar.
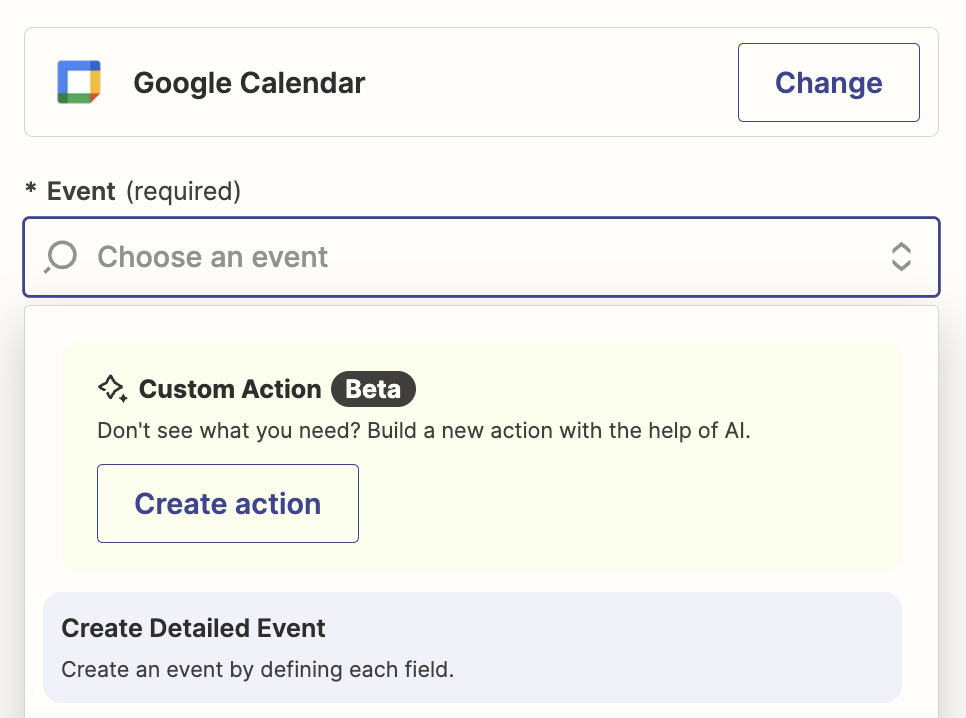
- This is where you have the freedom to be a bit creative. For this demo, I’m going to be creating a detailed calendar event.
Go ahead and select the “Event” of your choice and then select Continue.
- Next, we’re going to connect the appropriate calendar account.
You can either pick from an existing connected account, or select + Connect a new account if you don’t see the account you need.
↪Once you have selected your calendar account, click Continue.
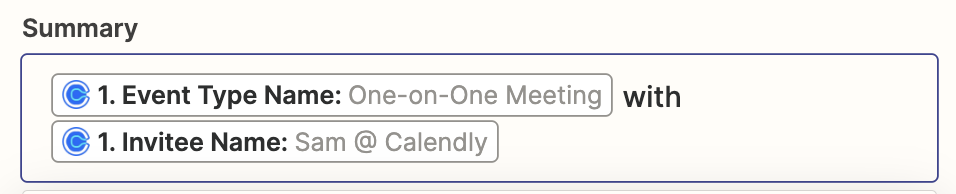
- Fill out the “Action” fields according to your preferences. I recommend using the Calendly variables for maximum automation power ⚡.
For Example: For the “Summary” (which will become the calendar event title), I’ve used the “Event Type Name” variable and the “Invitee Name” variable, as shown here.
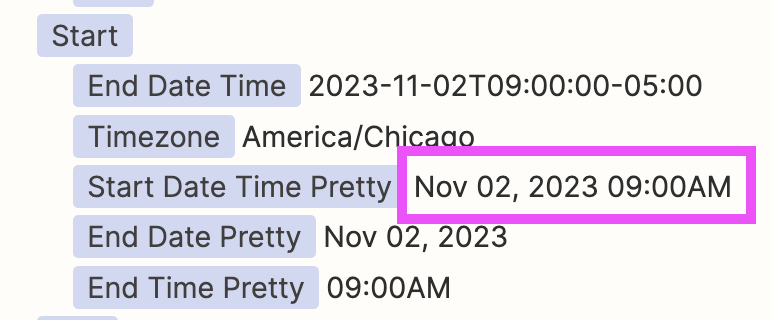
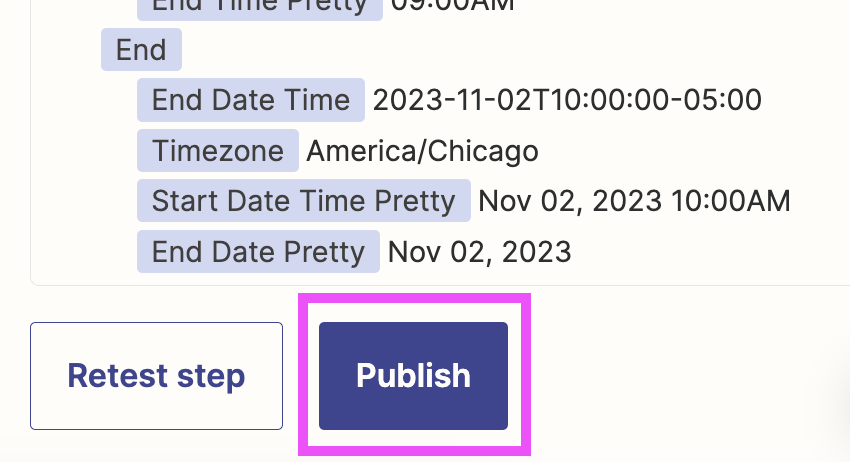
- Once you have configured all of your options, Zapier will ask you to test your zap. If you decide to run a test, you can check to confirm the date/time of the test event in the proofing details provided.
For Example, my test event was added on November 2nd, 2023 at 9:00am.
- If all looks as it should, you’re ready to hit Publish!


Love this workaround? Have questions about other possible workarounds? Let us know in the comments below!