How to modify the email confirmation an invitee receives?
Hi everyone,
Does anyone know how to modify the email sent to my customers after they confirm an appointment with me?
I've changed the title and description of the event on Google Calendar for my customers, but I can't change the generic email with information I don't want them to receive.
With Email Confirmations, Calendly sends the invitee an email notification from notifications@calendly.com and has a reply-to address that's associated with your Calendly login email. You can modify this on Account Settings page.
With Calendar Invitations, your connected calendar sends the invitee a notification of the booked meeting which has a reply-to address that's associated with your Add to calendar email on your Calendar Connection page.
Note: Calendar invitations are not compatible with the Outlook Plugin (for Windows users). Users with either of these calendar connections set up as their "add-to calendar" on their Calendar Connection page will be defaulted to Email Confirmations.
If you made changes to the title and description of the event and that translated to Google Calendar, then you are likely using calendar invitations. This means you’ll want to edit those. If you are using email confirmations, you’ll want to edit those. I go over how to do both in the short video below!
If you find you cannot make these changes, that will be because you are on our free plan. Users on our paid plans are able to make these changes and more. You can read more about our plans, pricing and features on our Pricing Page! Note: an annual subscription will result in a 20% discount for all paid plans! You’d need to upgrade to a paid plan to move forward, in that case.
I hope this helps!
Hey, thank you for your fast answer ^^
I think the answer to my question is that I need to upgrade my subscription, but can you confirm it thx to this video ?
Basically, I would like the second underline text to be the same that the first underline text.
Regards :)
Hey @Neo.G - thanks for following up! If you are on the free plan then yes, you’ll need to upgrade in order to customize. If you are on either a paid plan OR our free Teams Trial, you do not need to upgrade (but if you are on the Teams Trial you’ll need to upgrade to a paid plan before the trial ends).
Right now, it appears that you are on our free Teams Trial. So you are all good!
Now I can tell you exactly what is going on. =)
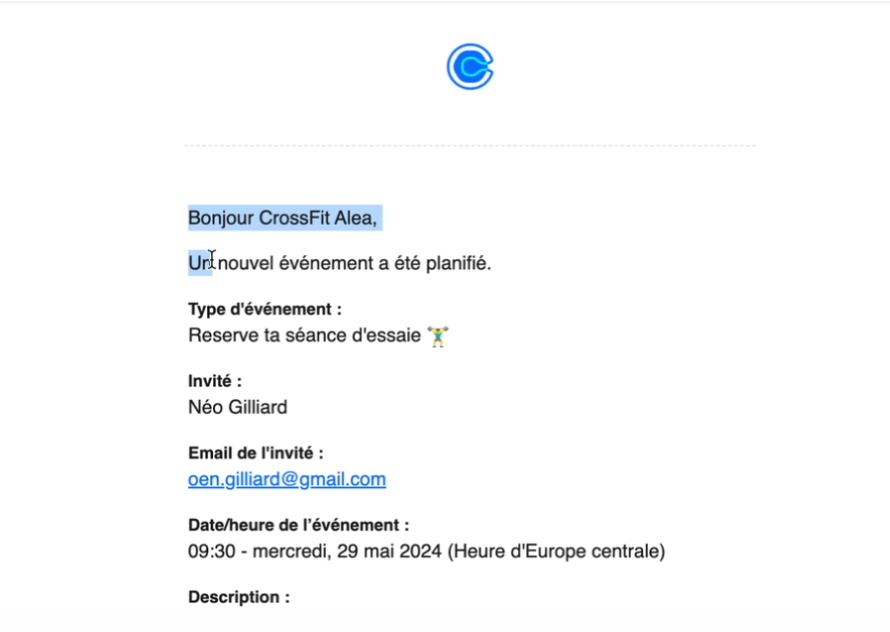
I see where the confusion lies! The email you showed at the end of the video is the email you receive as the host. A good indicator for this (so you do not get confused again) is the Calendly Logo at the top of the email + the formatting + the fact that it is telling you that a new booking came in:
That is not what the invitee sees. You are likely using your same login email for your test booking, causing the mixup. Read further for more details!
When you booked that test event, you went to look at your own calendar event first and then also checked your own email. Your email is the version that the host sees, not what the invitee sees. Every single time an invitee books with you, you will both get an event pushed to your “add to” calendar and an email sent to the email address you use to log into Calendly. This email is sent by notifications@calendly.com and is to make sure you know when you get a booking! This email contains default information and cannot be customized.
When you use calendar invitations, your “add to” calendar sends those invites to your invitee and the event that appears on your calendar and the invitee’s calendars will look the same.
When you customize your calendar invitations (which you have already done - that’s what the text you highlighted on the calendar event is!), that info is included in the “email” the invitee receives from your calendar invite (this is not an email sent by Calendly, but rather an extension of your calendar invite and a repetition of the info there).
So, if you were to book your test event using a different email address than the one you use to log into Calendly, you would then see what the invitee sees. Let me show you:
I get itt !!!!
Thank you so so much for the advice and the fast answer, you help me so much :)))
Have a good day Kelsi !
I might abuse of your kindness, but I'm also wondering why the times slots are not the same from a week to another like on my video, knowing that I set up my availability the same way for every week ?
Thx for your answer :)
I get itt !!!! Thank you so so much for the advice and the fast answer, you help me so much :)))
Have a good day Kelsi !
You are VERY welcome.
I might abuse of your kindness, but I'm also wondering why the times slots are not the same from a week to another like on my video, knowing that I set up my availability the same way for every week ?
Thx for your answer :)
You aren’t abusing anything! Lol. This is literally why I am here -- and I genuinely enjoy helping and troubleshooting for y’all!
This is expected behavior, though. So rather than troubleshoot -- I will explain for you!
When you set up your Availability Schedule and, in your case, have weekly availability that is the same from week-to-week, you will not automatically also see the same time slots on each day throughout the month. This is because your connected calendar (on your calendar sync page) that is set to “check for conflicts” is blocking off all times that are marked “busy” on your personal calendar, as well.
You can use our Troubleshooting availabilitytoolon your scheduling page in order to understand what's causing certain time slots to be blocked off. It will tell you exactly why any given time slot is unavailable right there, in real time. I find it to be super helpful and it resolves most availability issues.