How do I modify the automatic confirmation to the host after a booking? I wanted to add in some of the UTM parameters to more easily identify the point of origin for the meeting request.
Modify Automated Confirmation Email to Host
Best answer by Kelsi
Hey again
The automated email confirmation sent to the host will be the same each time. It cannot be customized. However, you can still set up a confirmation that you do customize!
You can use the above linked Workflows feature to set up emails to the host as soon as a booking is made (or at any specified time after a booking is made).
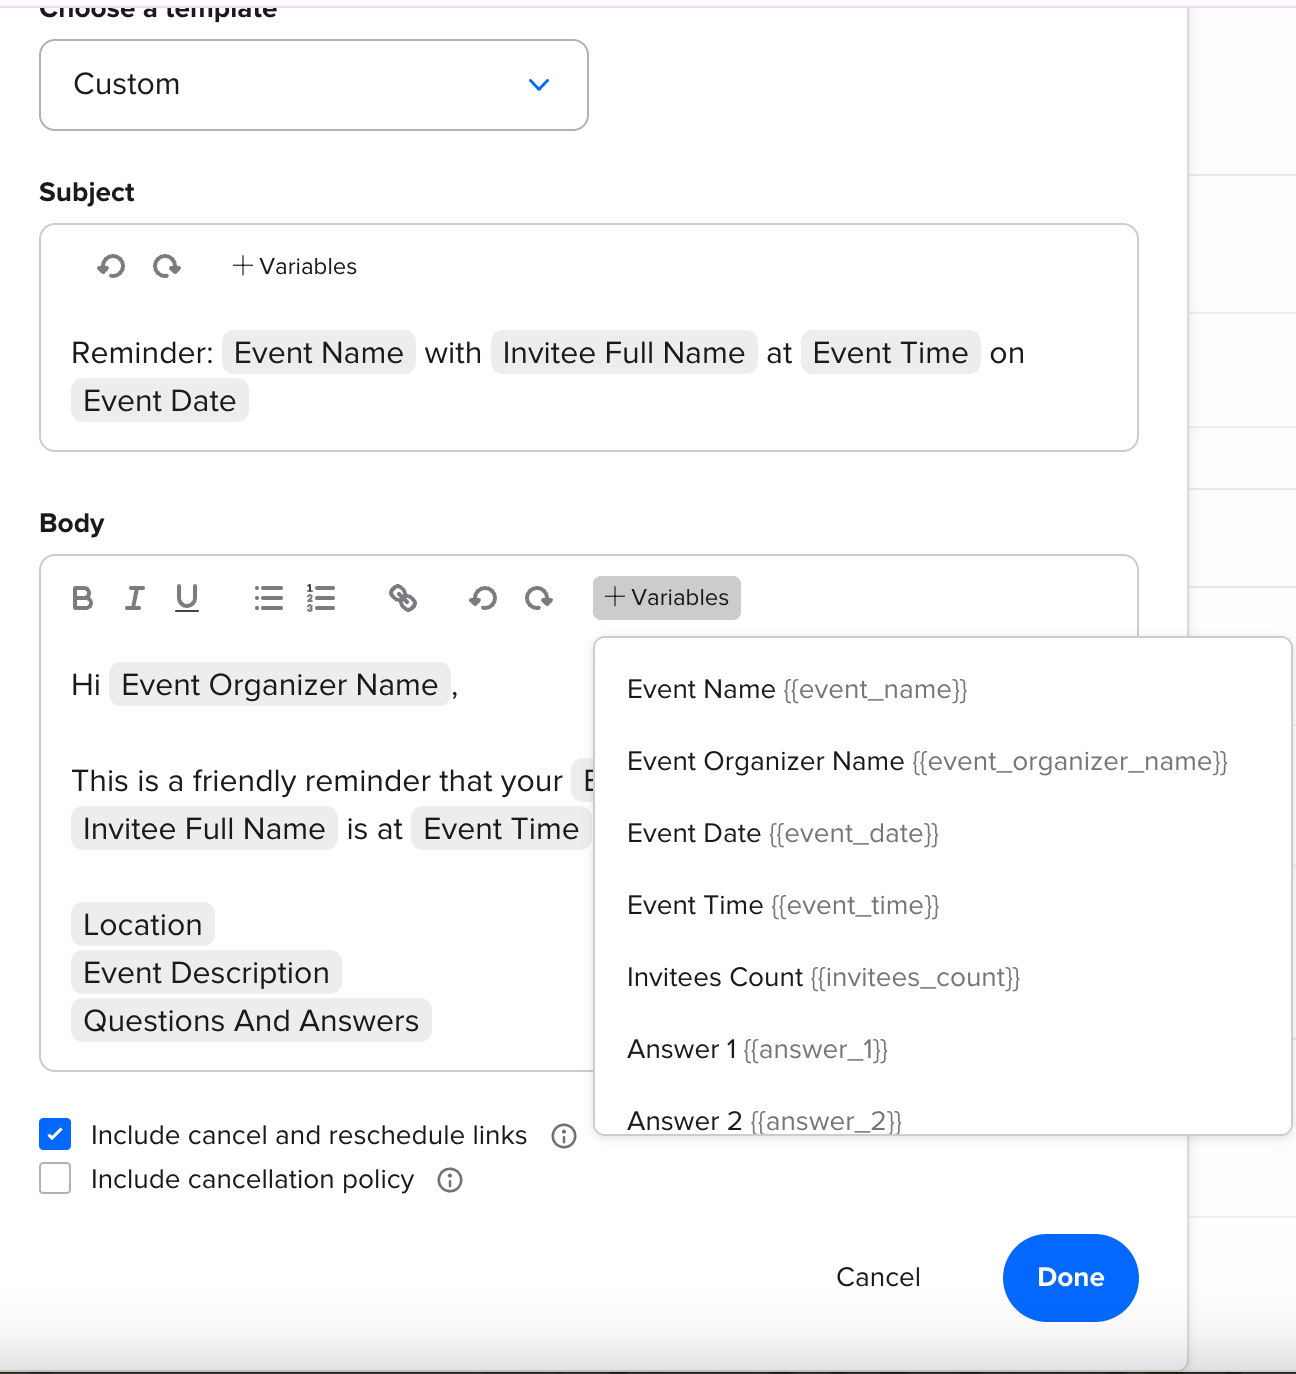
Head into your Workflows tab and create your new “email reminder to host” Workflow. Once you’ve done this click “edit” (shown below) under “do this” and next to “send email to host” > use the text field and desired variables to customize the email! Hope this is helpful!


Sign up
Already have an account? Login
Not a Calendly user yet? Head on over to Calendly.com to get started before logging into the community.
Employee Login Customer LoginLogin to the community
Not a Calendly user yet? Head on over to Calendly.com to get started before logging into the community.
Employee Login Customer LoginEnter your E-mail address. We'll send you an e-mail with instructions to reset your password.

