Best Practices for Integrating Calendly on a Website?
Hi everyone,
I'm looking to integrate Calendly into our company's website hillsdot.com . What are the best practices for embedding Calendly on a site to ensure a seamless user experience? Are there specific tools or techniques that work particularly well for customization and integration? Any advice or examples would be greatly appreciated!
Page 1 / 1
Hey there @Podcast65884 -- thanks for your post. I do hope other Calendly Community users that have similar use cases chime in, for sure! In the meantime I’m going to share some of our best information about embedding on websites and different platforms, just in case you find it useful as well!
Note
If you are looking to make large customizations to your Calendly embed, we recommend viewing the resources in our developer portal.
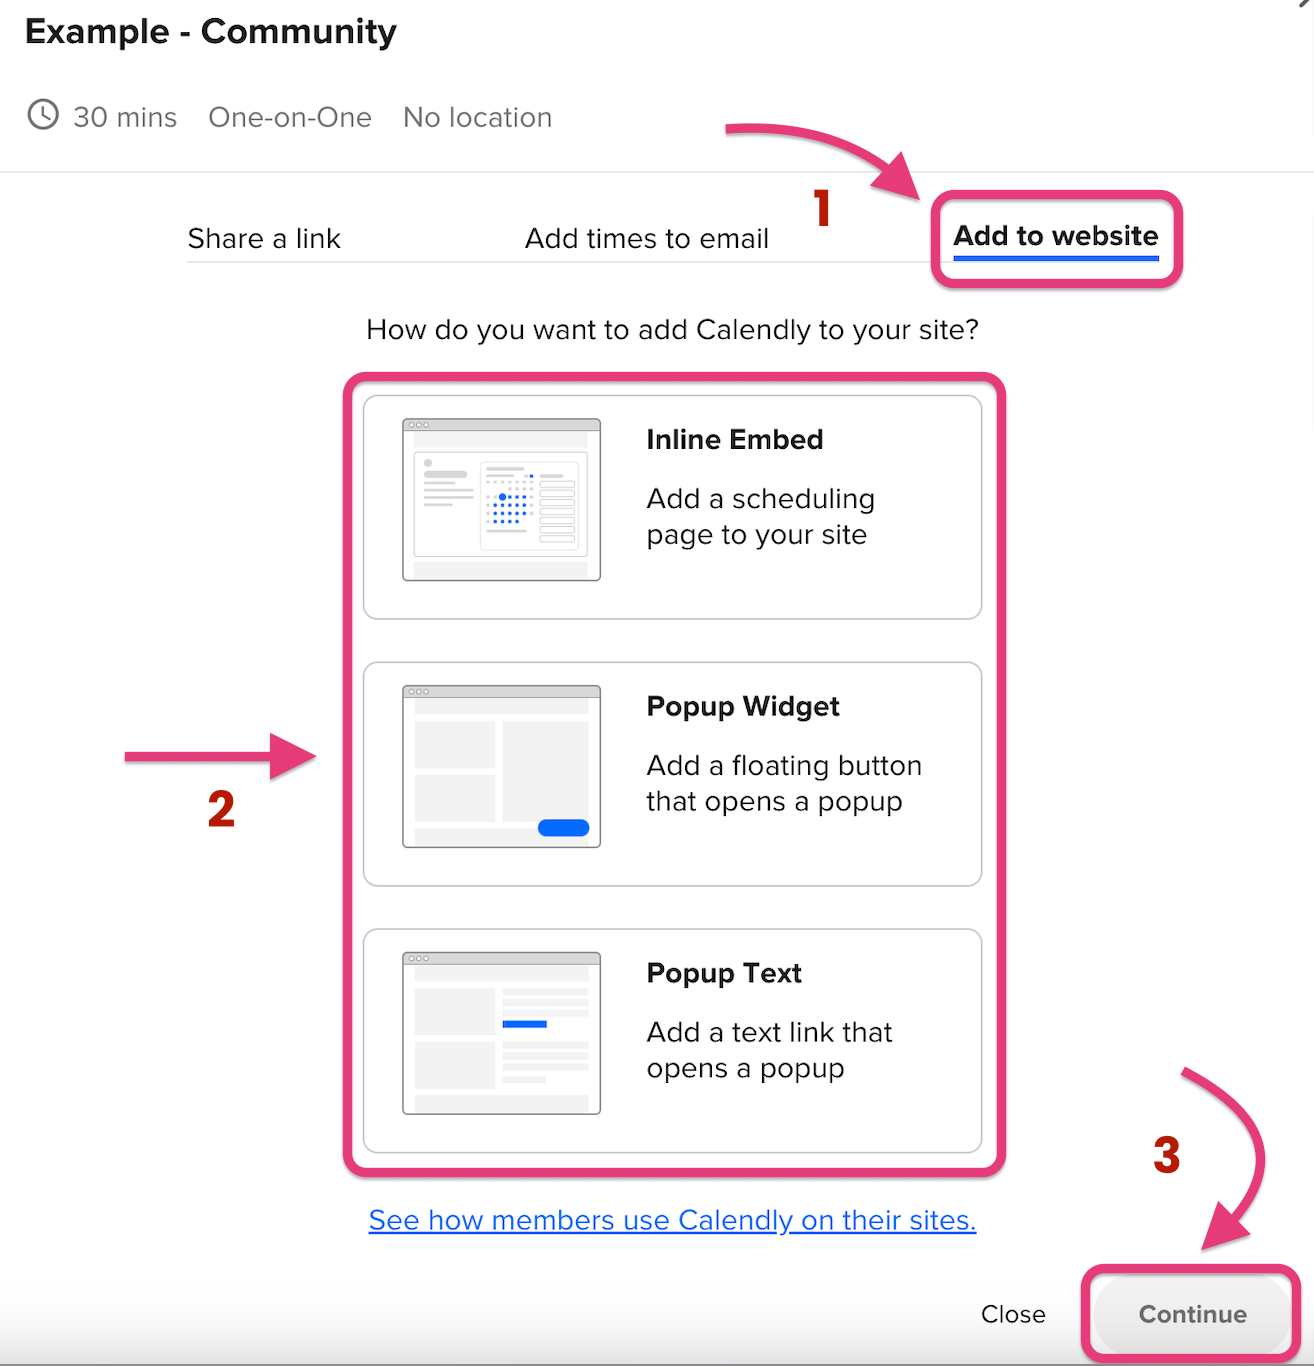
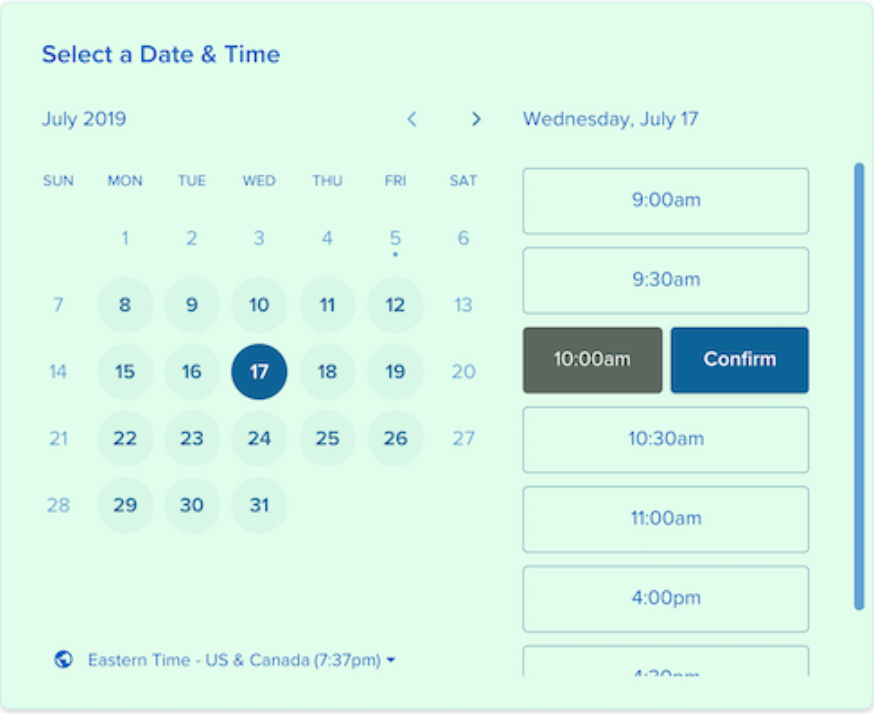
You can add your Calendly booking flow directly to your website so your website visitors can schedule with you without leaving your site. You can choose from three customizable embed options (explained below).
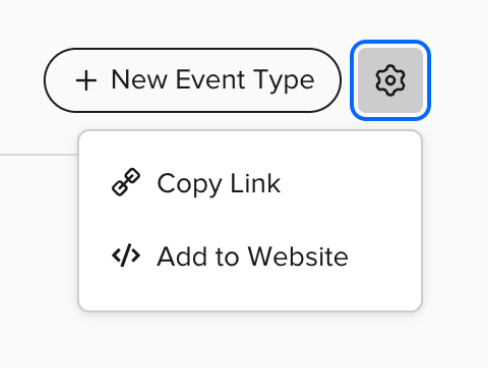
To embed a landing page with multiple event types, visit the Event Types tab on your Home page. Find the team or user whose landing page you'd like to share. Select the gear icon and then select Add to Website. Then, choose the type of embed that you prefer and adjust the appearance to fit your site.
Add an event type scheduling page to your website
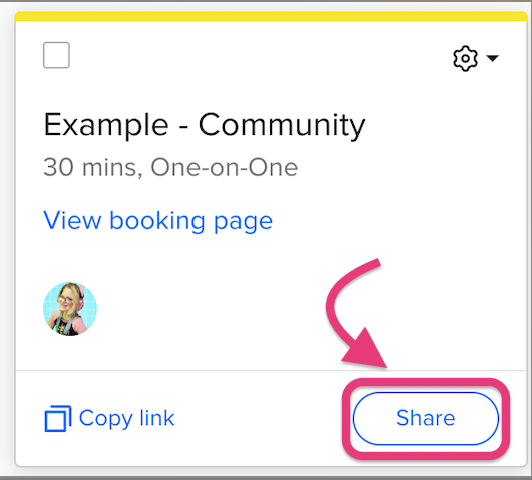
Control the type of meeting your site visitors schedule by embedding an event type scheduling page. Visit the Event Types tab on your Home page. Locate the event type you would like to embed, and select Share. In the pop-up, select Add to Website. Then, choose the type of embed that you prefer and adjust the appearance to fit your site.
Customizing your embed
Hide event details
All three embed types allow you to Hide Event Details. You can enable this option to remove your avatar, the event type name, the location, and the event type details when Calendly is embedded. This will reduce any duplicate content you may have already added to your website.
Customize the color and button text
Color and button text customizations are available for the pop-up widget embed, and you can edit the text shown for the pop-up text option. Users with paid subscriptions have access to more color customization settings, including background color, text color, and button & link color.
Once you’re happy with the changes, copy the code to add it to your web page.
Need more help? Check out our embed guides for some of the most popular website platforms.
Using the developer embed code
Note
I am including the very basic and beginning of this Developer Embed information. If you’d like more information, please head to our Developer Portal!
By making a JavaScript API call, you can create an inline embed on demand. This will allow you to delay the appearance of the embed until specific actions are completed, or until information is collected to be used for pre-filling the booking form.
Create a div on your site with a specific ID. Include the Calendly Javascript file somewhere on your site as well:
Make sure to include the parentElement, otherwise the embed will always load at the bottom of your web page.
There is more information where this came from -- so just let me know if you need me to dig deeper, and I’ll be happy to! However, this should all be more than enough to get you going.