


New! Send invoices with Calendly

Hey CalPals,
I’m back again with a new way to get paid with Calendly: Invoices 🎉
You can now create and send invoices directly from Calendly, collect payment through Stripe, and track payment status in one place.
Use invoices for post-meeting billing, installments, project-based work, or services that aren’t tied to a booked event.
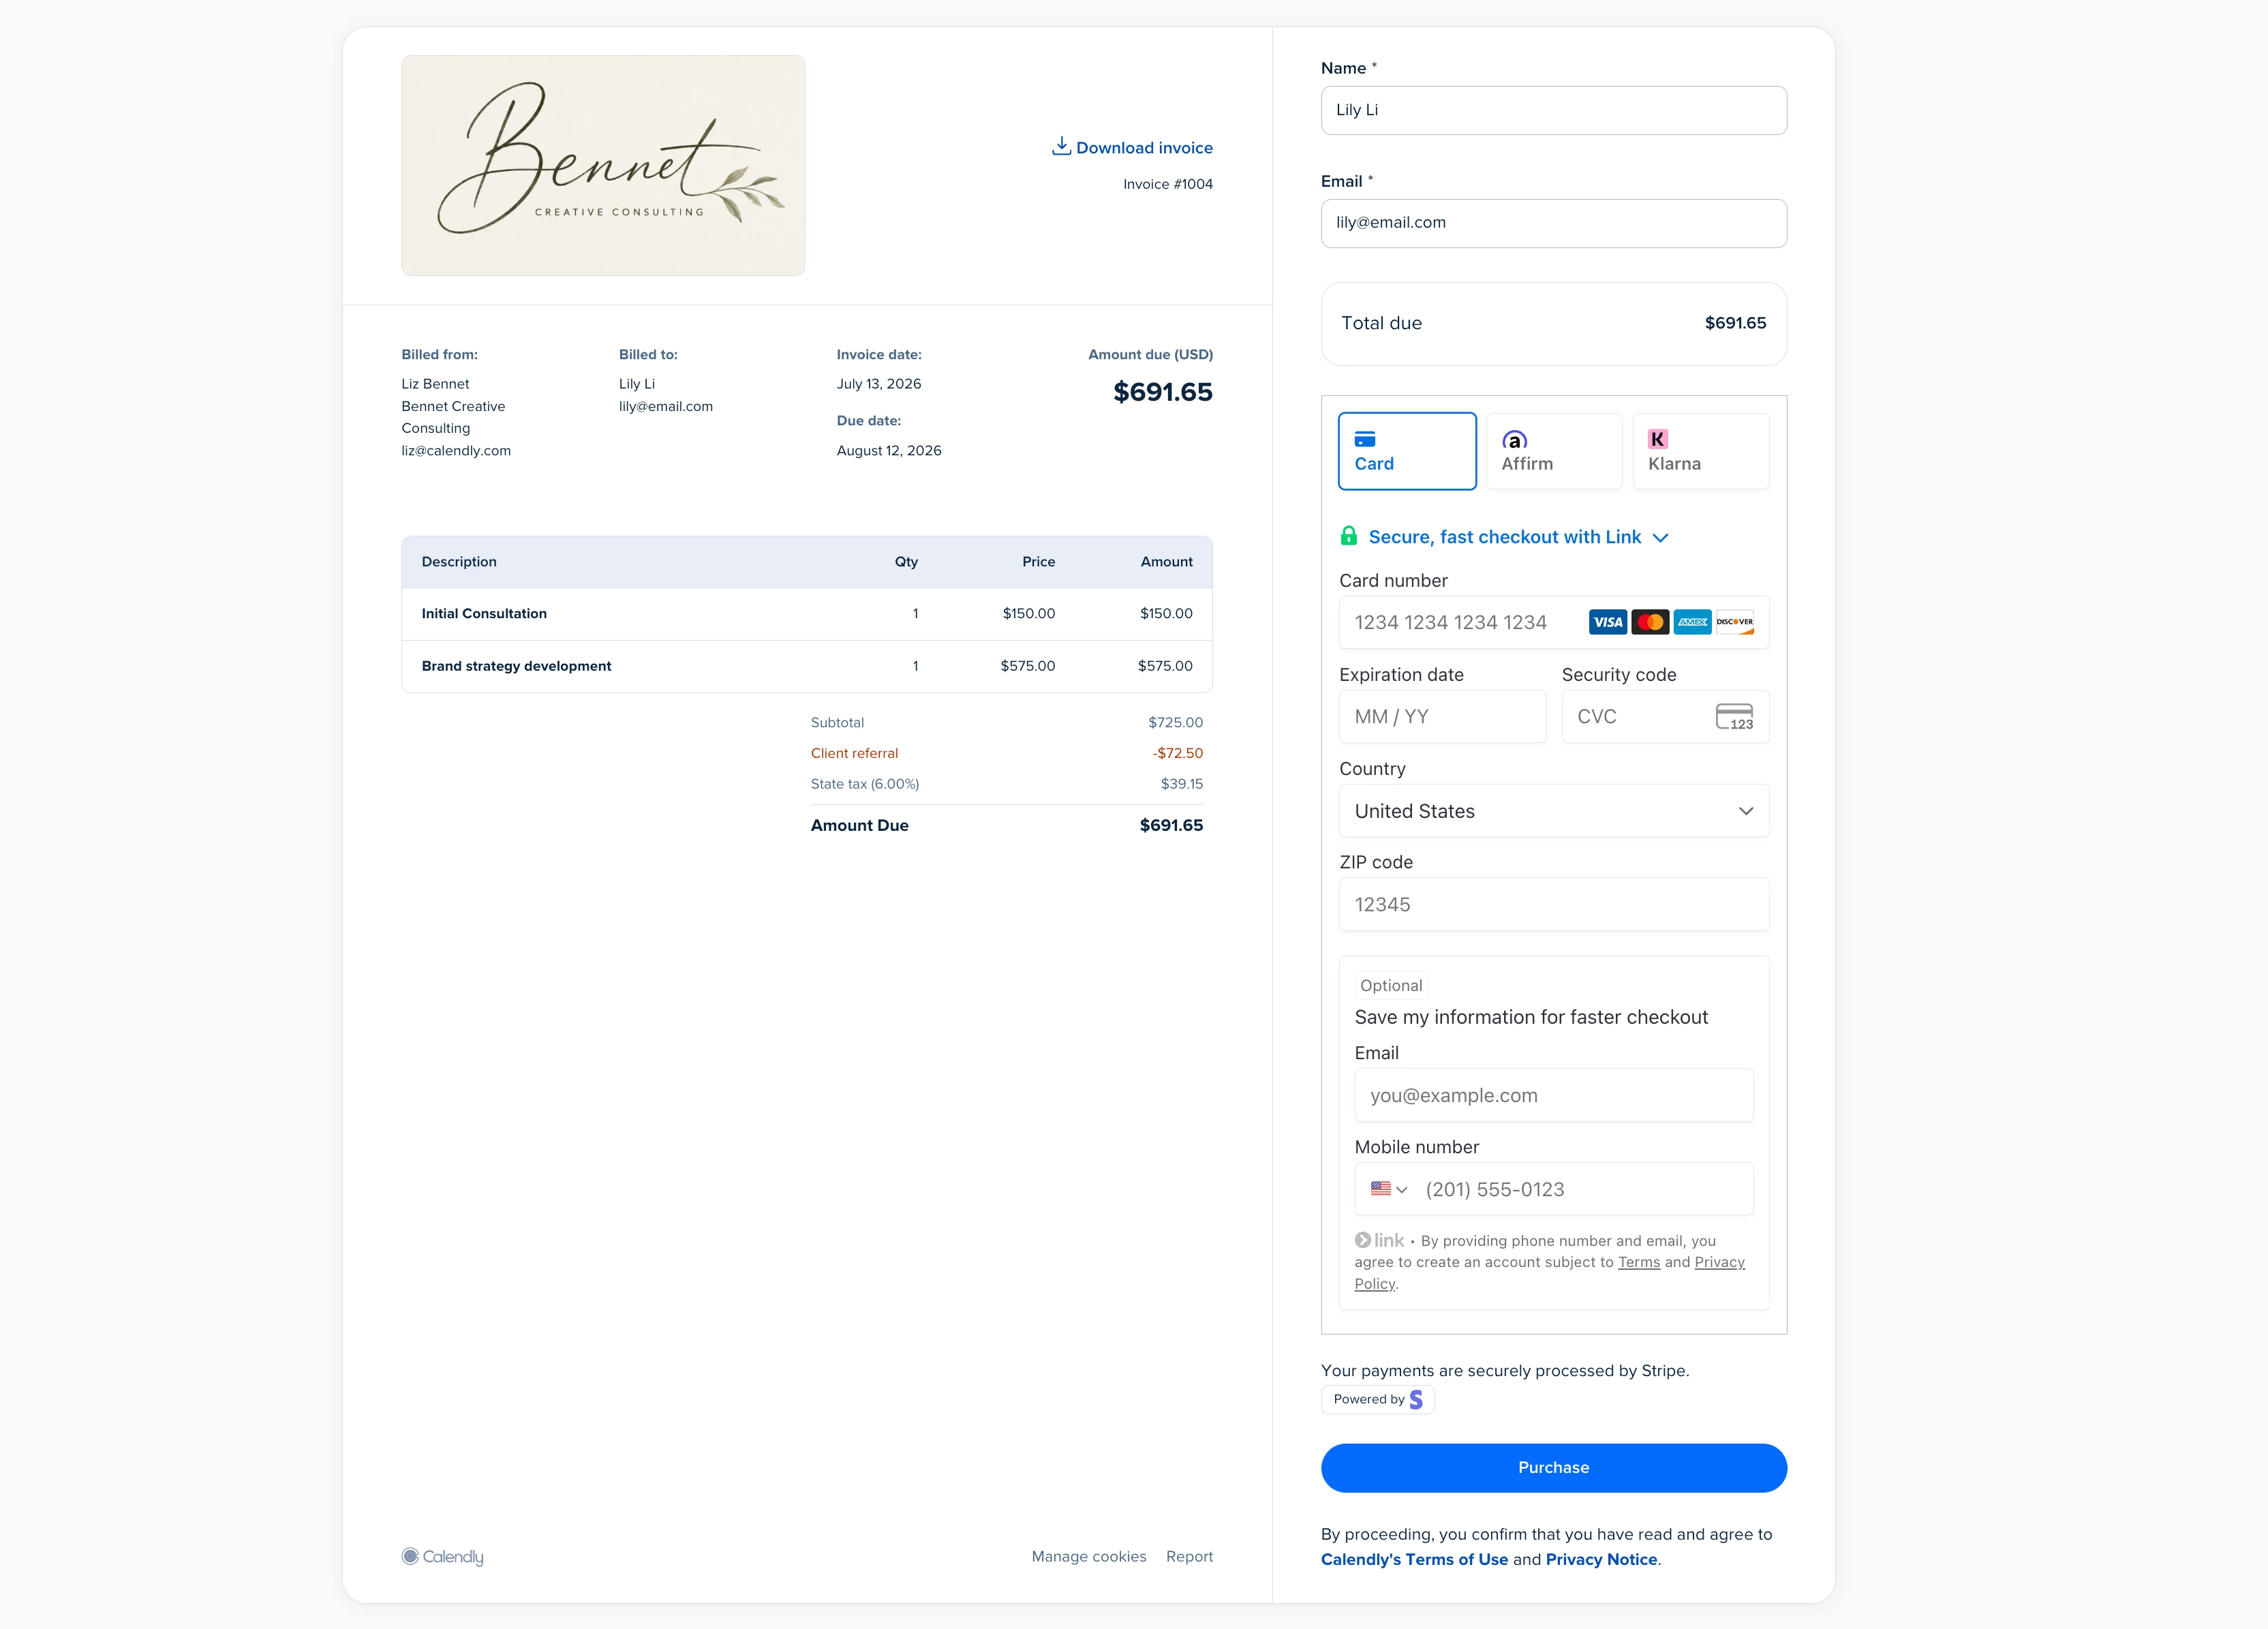
With invoices, you can:
- Create branded invoices with line items, taxes, discounts, due dates, and notes
- Send invoices by email or share them with a direct link
- Let clients review and pay through a hosted invoice page
- Track payment status, including sent, viewed, paid, and overdue
- Send reminders and view paid invoice activity in Calendly
How to get started
⚠️Be sure you’re already connected to Stripe before creating an invoice.
- Go to Payments > Invoices, then click Create invoice
- (Optional) Upload an image to include your logo or related visual
- Under Billed to, add your client details or select an existing contact
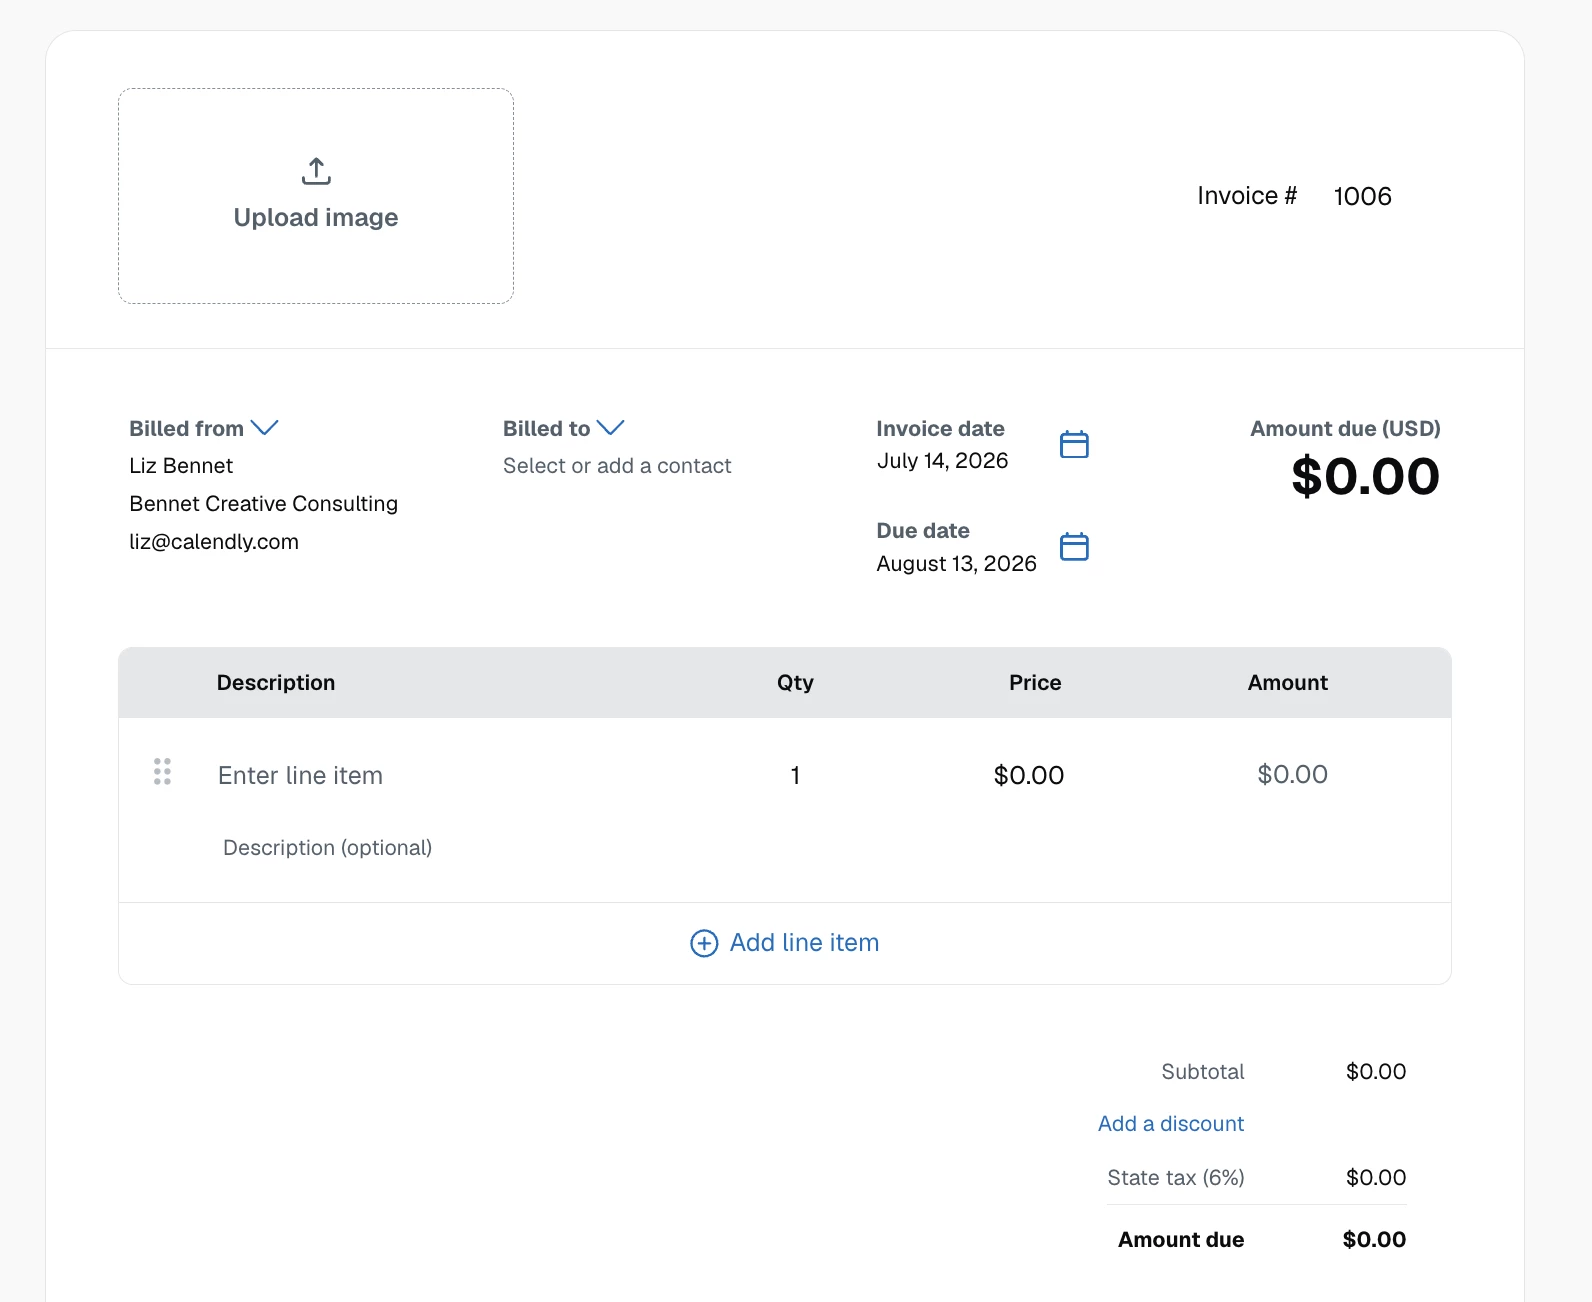
- Add invoice details (line items, price, descriptions) and discounts
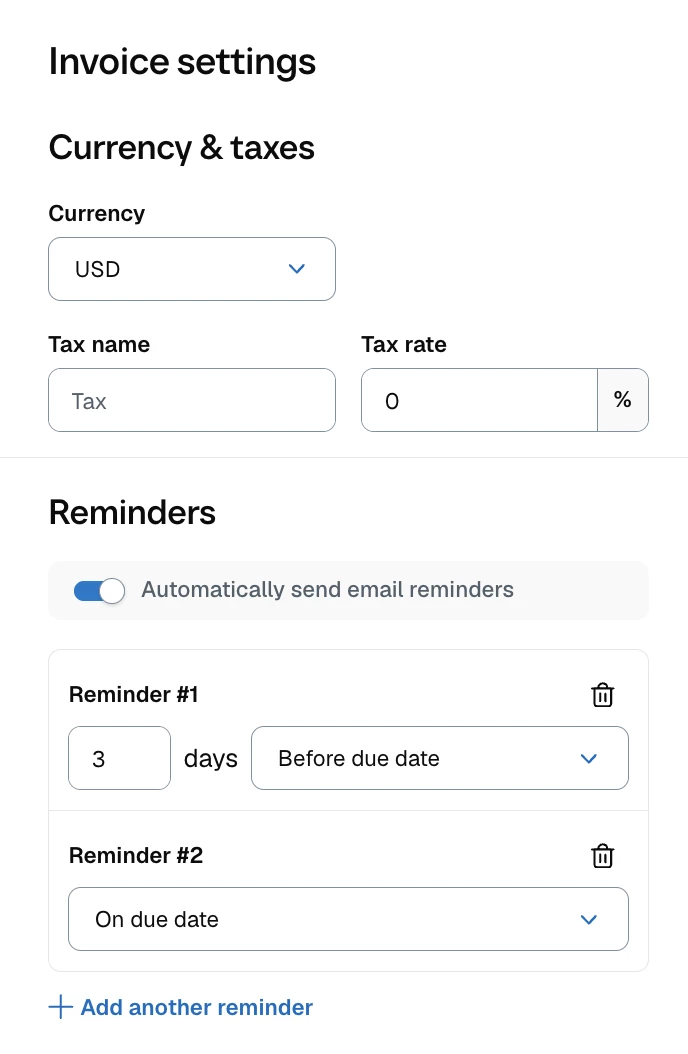
- (Optional) Include taxes and configure reminder emails
- Preview the invoice, then send it by email or copy the direct link to share
❗Once sent, you can track status, send reminders, duplicate, or cancel invoices from the Invoices tab in Payments.
FAQs
Q.Do I have to use Stripe? Can I use this with the PayPal Integration?
A. Yes. You’ll need to connect Stripe to create invoices and collect payment through Calendly.
Q. Can invoices be sent automatically after someone books?
A. Not at this time.
Q. How can I send an invoice to a client?
A. You can send an invoice by email from Calendly or copy the direct link to share it yourself.
Q. When should I use an invoice instead of a payment link?
A. Use an invoice when you need a more formal payment request with line items, due dates, and status tracking. Use payment links for quick, one-off payment requests.
Have questions or feedback? Leave a comment below, or visit the Help Center to learn more.