
Sending custom texts with ClickSend
Ever wanted to send a more personalized message to your invitees over text? Wanted to use a custom phone number when reaching out to clients? With the Zapier integration you can do this by using Calendly + ClickSend.

Want to learn more about ClickSend? You can visit their website here: ClickSend
Before setting up this automation, make sure you have:
A ClickSend account (free or paid)
A connected Calendly account
First, we’ll need to connect both applications to Zapier
Create your Zapier account and head over to this link to connect both Calendly and ClickSend to Zapier: https://zapier.com/apps/calendly/integrations/clicksend
Once they’re both connected, start creating your first Zap!
Want to skip a few steps? Use Zapiers Co-Pilot to simplify the setup, you can use one of these AI Prompts to make the process faster:
For all Events:
When an Invitee is created in Calendly, send a text with ClickSend
For Specific events:
When an invitee is created in Calendly, send a text with ClickSend. Add a filter step in between so it only triggers for specific events
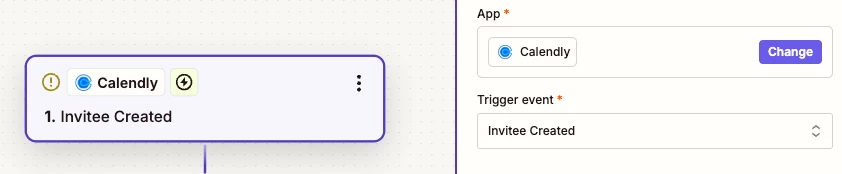
- Go to your Zapier home page, and select Zap under Start from Scratch:

- Set Calendly as the action and Choose the trigger event:
“Invitee Created” – This fires every time someone schedules a meeting with you via Calendly.
- Connect your Calendly account and test the trigger to make sure data is coming through.
- In Calendly, make sure you add a question asking for the invitee’s phone number, we’ll need this so ClickSend knows where to send the text:
Next, set ClickSend as the Action App
- Search for ClickSend and select it as your Action App.

- Set the Action Event to Send SMS or MMS depending on how you’d like to send the text
- Connect your ClickSend Account
- Test the ClickSend action to confirm the message appears as expected.
Finally, turn on and test your new Zap
Schedule a meeting with yourself to make sure the message is sent correctly.
From this point on, every time a new Calendly event is booked, ClickSend will automatically send a text to that invitee.
FAQ
Q. How do I set it so it doesn’t send a text immediately?
A. You can add Zapiers Delay Step to delay the action for a certain amount of time: