Hey there CalPals! Something I find myself mentioning all the time in my support interactions is how robust a tool Calendly can be when you have a good understanding of how it all works.
With that in mind, I thought it was about time that I write up some articles on different features and settings in every Calendly account, from the free plan to Enterprise. Unofficially, I’m calling these my Calendly 101 articles.
We’re going to start off with a fun and fun-ctional setting you’ll find in every Calendly event type, start time increments.
What are Start Time Increments?
Ever wondered why your live booking page displays times in 30 min increments or intervals when you first create a new event type? That would be the default “Start time increments” settings at work.
You might also find yourself asking:
- Why isn’t my booking page showing the right times to book?
- Why don’t the available times on my booking page match the availability blocks I set for my event type?
Start time increments are the interval your live booking page will use to display available meeting start times.
How do you want your available start times to be spread out on your booking page?
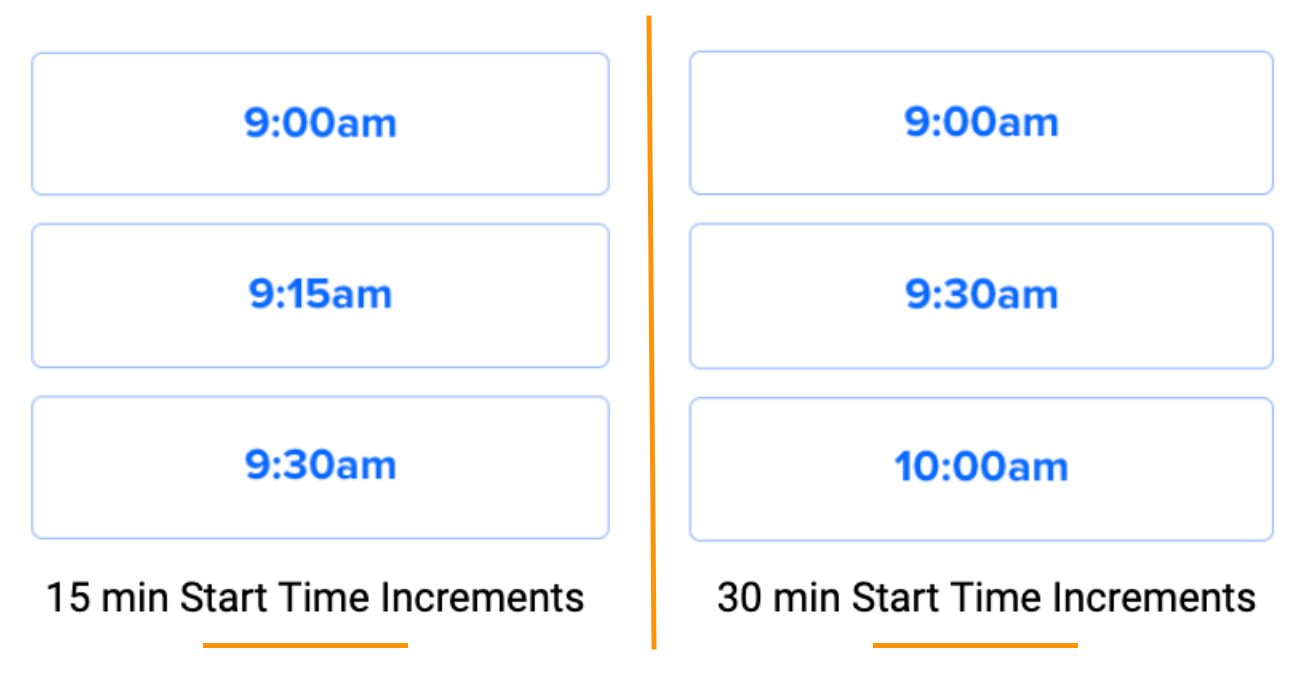
For example, on the left below, a 15 minute start time interval, and on the right, a 30 minute start time interval:
How is the start time interval different from the event type duration?
The event type duration refers to the length of a booked event. How long will you be meeting for? What amount of time do you want your invitees to be able to reserve for that type of event?
Take a look at where you’ll see each of these settings options in action on your live booking page here:
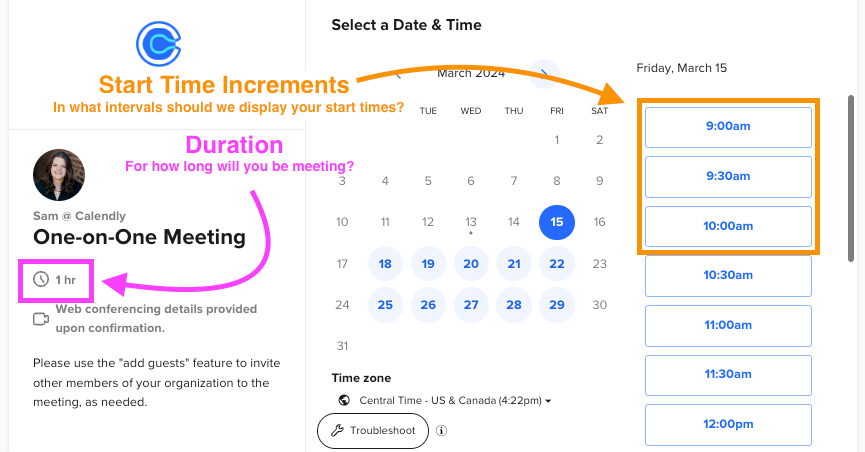
💡Tip: Your start time increment settings are independent from your event type’s duration settings and will not automatically update when you change the event type duration.
Whenever you create a new event type in Calendly (not a clone), the majority of the settings are pre-filled by defaults to help you get scheduling as quickly and efficiently as possible.
The start time increment default is 30 mins, which is where those 30 min increments are coming from when you first create an event type.
How can I update my start time increments?
You can update the start time increments of an event type at any time by following these steps:
- Navigate to your event type’s settings page by clicking on the event type from your home page.
- Select More Options at the bottom of the editor.
- Select Booking Page Options, and the option will be here:
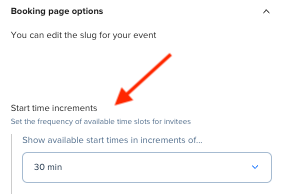
- Set your desired start time increment.
- Click Save Changes
That’s it! So why is this setting so important?
Controlling your availability
You can use your start time increments to fine-tune your availability and accomplish your unique scheduling goals. Below, I’ve provided some use case examples for how start time increments can help you customize your availability.
I want to appear more “in demand”
You can use start time increments to space out the times your event type is offered.
If you want to be able to offer more flexible availability to specific people, you can clone your event type, make it secret, and adjust your start time increments. You can then share this secret event type with those specific people.
Want to make sure this link isn’t used to book unwanted meetings in the future? Try making the link single use!
I need my booking page to display specific time slots
I’ve seen some users attempt to achieve this by creating what I call a “perforated schedule” using date-specific hours. While I completely understand this train of thought, you’ll end up doing way more work than you need to.
To accomplish this goal in a more seamless and efficient way, you’ll want to:
- Set your available hours in compound blocks
- For example, if I want to offer the time slots 8:00-9:00, 9:00-10:00, and 10:00-11:00, I’d set my availability as 8:00-11:00.
- Configure your start time increments to match your event duration
- Following the above example, I’d set my start time increments to 60 mins.
I don’t want back-to-back bookings
I know, I know– What about buffers? Yes, buffers are a great way to spread out your bookings, but start time increments are another great option.
You can set your start time increments to be longer than your event type’s duration, which will prevent invitees from being able to book back-to-back meetings of the same event type.
- For example, if I want 15 minutes to wrap up after a 15 min discovery call, I would want to set my start time increments to 30 mins.
Note: If you want to prevent back-to-back bookings across multiple event types, buffers will be the way to go. This is because when a booked event has a buffer, Calendly will see you as unavailable across all of your event types for the duration of the buffer.
Troubleshooting Start Time Increments
Many times, we see users writing into support asking why their event type is offering times at the wrong intervals.
- For example, a 15 minute event type only displaying times on the half-hour (eg. 9:00am, 9:30am, etc)
More often than not, this is due to the event type’s start time increments still being set to the 30 minute default.
If updating your start time increments does not resolve the issue, please double check your booking page’s Troubleshooting Tool to make sure the desired booking times are not blocked off with another type of conflict.
Alrighty, that’s all for Start Time Increments 101! Keep an eye out for more Calendly 101 as I expand the series, diving into the nitty gritty of fundamental Calendly settings and what they’re capable of.
Signing off for now 🫡
- Sam


